Showing posts with label Craftsy. Show all posts

Wednesday, December 9, 2015

Machine Quilted Text: A Finished Mini Quilt

This post contains affiliate links.


I was really excited to try out adding text to my quilt by way of Creative Quilting with Your Walking Foot. Adding text to your quilt is one of the last things Jacquie teaches in her class.


I decided to test my skill with a mini quilt. Naturally, I chose the word "create". I chose a simple font (Jacquie says a simple font is important for this technique) from my word processing software and increased the font size. I printed it on card stock so that it would be easier to work with and hold up long enough for me to complete marking the letters on my quilt top.


I applied a little bit of glue stick to the back of each letter to keep it still while I was marking around it. I used a blue water soluble pen to trace around each letter.


Then I started matchstick quilting around each letter. The blue tape is a registration line so that my quilting lines don't start leaning to the left or right. I always have a straight line point of reference.


And here are the first three letters all quilted and pretty. Then I saw the word "ate" and had to stop and get a snack. Ha.


All finished!! Let's go over the size of this project. The blue background was cut 8 1/2 inches x 14 1/2 inches. The border is 4 inch strips. The top and bottom are 4 inches x 14 1/2 inches. The side strips are 4 inches x 15 1/2 inches. After quilting and squaring up, this project finishes at 21 inches x 15 inches. The letters are 2 inches tall.


Here's how it looks from the back. For the border, I simply followed the grid design on the fabric.


If I had it to do all over again, there are a few things I would do differently.
  • Use bigger letters! These letters are two inches tall. That is tiny when it comes to quilting around them. I am happy with the result but it was tricky quilting inside the "e" and "a".
  • I would practice starts and stops. I used the technique of setting my stitch length to zero, stitching a few stitches, then setting it to the quilting stitch length. While this worked, there are spots that look a little knotty. 
  • I wanted a thread that contrasted with the background, and this one does, but I think I will try a darker than background thread next time. That is more of a personal preference.
This mini quilt will hang right beside my sewing machine to remind me to always be creative. I have really enjoyed the Creative Quilting with Your Walking Foot class and know the techniques I learned there will show up over and over again in my quilting. If you are looking for a machine quilting class, you should consider this one.

Linking up with Scraptastic Tuesday at She Can Quilt, Fabric Tuesday at Quilt Story, and Work in Progress Wednesday at Freshly Pieced. Also linking up to Whoop Whoop at Confessions of a Fabric Addict and Finish It Up Friday at Crazy Mom Quilts.

Thursday, November 26, 2015

Perfect Gift Ideas for Quilters - Basic Supply Needs

This post contains affiliate links.

Sometimes, shopping for a quilter can be a challenge. Generally, we all have tastes and preferences for fabric which can make it hard for non-quilters, and other quilters for that matter, to know what to give as a gift. I have long been a fan of Craftsy for classes, but have only recently started becoming familiar with their large assortment of supplies.

For us quilters, there are some basic supplies that we always need. It's sort of like tires for the car. They are necessary, but not necessarily fun to purchase. Not as much fun as shopping for fabric anyway!

I did a little browsing earlier this week and made a list of supplies that almost any quilter would be happy to receive. If you think your special quilter (or you!) would like to purchase any of these, all you need to do is click on the picture and it will take you straight to that product.


Aurifil Best Selection Box 


Thread - I cannot say enough good things about Aurifil thread. While thread can be a very specific thing, all quilters need a good assortment of neutral colors and Aurifil's 50 weight cotton thread is the perfect choice. This assortment would be better than a box of candy for any quilter. And Craftsy's prices for Aurifil thread are the best I have seen, even when they aren't on sale.

Schmetz Sharp/ Microtex Machine Needles 5ct


Machine Needles - A good quilter will change their machine needle after every project. A fresh, sharp needle can make a big difference in stitch quality. I generally use more of the 80/12 and 90/14 size and love the Schmetz Sharps.


Clover Patchwork Glass Head Pins


Glass Head Pins - These pins are the best for quilting. They are fine so as not to cause distortion or bulk and stay very sharp. This is another supply that it is good to have extras. Because these pins are fine, they can bend easily causing the supply to dwindle over time.

Dritz Purple Ergonomic Seam Ripper 


Seam Ripper - This is one of those supplies that likes to disappear mysteriously from the sewing room, which means that multiples are a very good thing. I prefer a seam ripper with a good handle. Some have very wimpy handles that are hard to hold in any steady manner. These have a solid handle that is easy to hold and don't tire your hand as much if you happen to have a lot of stitches to pick out (which I hope you never do!)


Clover Water Soluble Marker


Clover Water Soluble Pen - I use these pens all the time for marking free motion designs or other important points on my quilts. The marks disappear when sprayed with water. I have never had an issue with the marks not coming out. It is very frustrating to be in the middle of marking a project and have one of these run out. Extras are a very good thing.

Clover Chaco Liner Pen Style Chalk


Chalk Marker - I don't have a lot of experience with these but after watching Lori Kennedy use these in her Divide & Conquer free motion quilting class, I decided to add them to my collection of must have supplies. Light colors are for dark fabric; dark colors for light fabric. It is good to have an assortment.

Clover Hera Tool for Marking


Hera marker - This tool is great for marking your quilt when you really don't want to use either chalk or a water soluble pen. Really, a quilter only needs one of these but they are relatively small and easily lost in a busy sewing room, so it would be good to have a back up on hand.

Other supplies that are great basics for a quilter are cutting mats, rulers, and batting. These are supplies that most quilters are a little more particular about but if you have that intimate quilting relationship, these would be great options, too.

There are a couple of other extra special things coming from Craftsy that I would like to share with you as well...

http://www.shareasale.com/m-pr.cfm?merchantID=29190&userID=1182760&productID=603079969

http://www.shareasale.com/r.cfm?B=797328&U=1182760&M=29190&urllink=

Here is wishing you a calm and peaceful holiday season. Isn't it great that we can enjoy doing much of our shopping from the comfort of our home? I love not having to fight the crowds.

Wednesday, November 4, 2015

A Christmas Quilt - What I Learned in Craftsy's Divide and Conquer Class

This post contains affiliate links.


This is what happens when you get into the Craftsy class you are taking. I finished all the lessons for Lori Kennedy's Divide and Conquer free motion quilting class and could not wait to make my first project to practice all that I had learned.

Divide & Conquer: Creative Quilting for Any Space

It's a great class and clicking on the class icon will take you to all the information for it. This class helped me in a lot of ways, but specifically, it helped me with designing the quilting for any given project.


The first step is to plan. I'm not good at this step. I tend to want to just dive right in and hope for the best. But this time I thought it through. One of the things I learned (again) is that for the quilting to really stand out, the fabric needs to be solid. So I started with a Moda Bella solid in Porcelain for the main fabric and framed it with some yummy scraps of Christmas fabric from my stash.


I decided to go for a framed composition and scoured Lori's blog for fitting motifs. The class offers lots and lots of motifs. I chose the grid pop motif from the class and then added Christmas motifs from Lori's blog for my project. The center motif will be a poinsettia, then grid pop, pretty packages, and snowflakes.


The threads were selected to complement the colors in the border fabric. One mistake I tend to make in projects like this is to overdo with too many motifs or too many different thread colors. I'm trying to be a tiny bit more conservative with that, so deciding which colors to use and where to use them took a bit of time. As the project progressed, I only used two of the threads pictured: the cream Aurifil 50 weight cotton thread and the 30 weight Sulky Blendable in red, gold, and green.

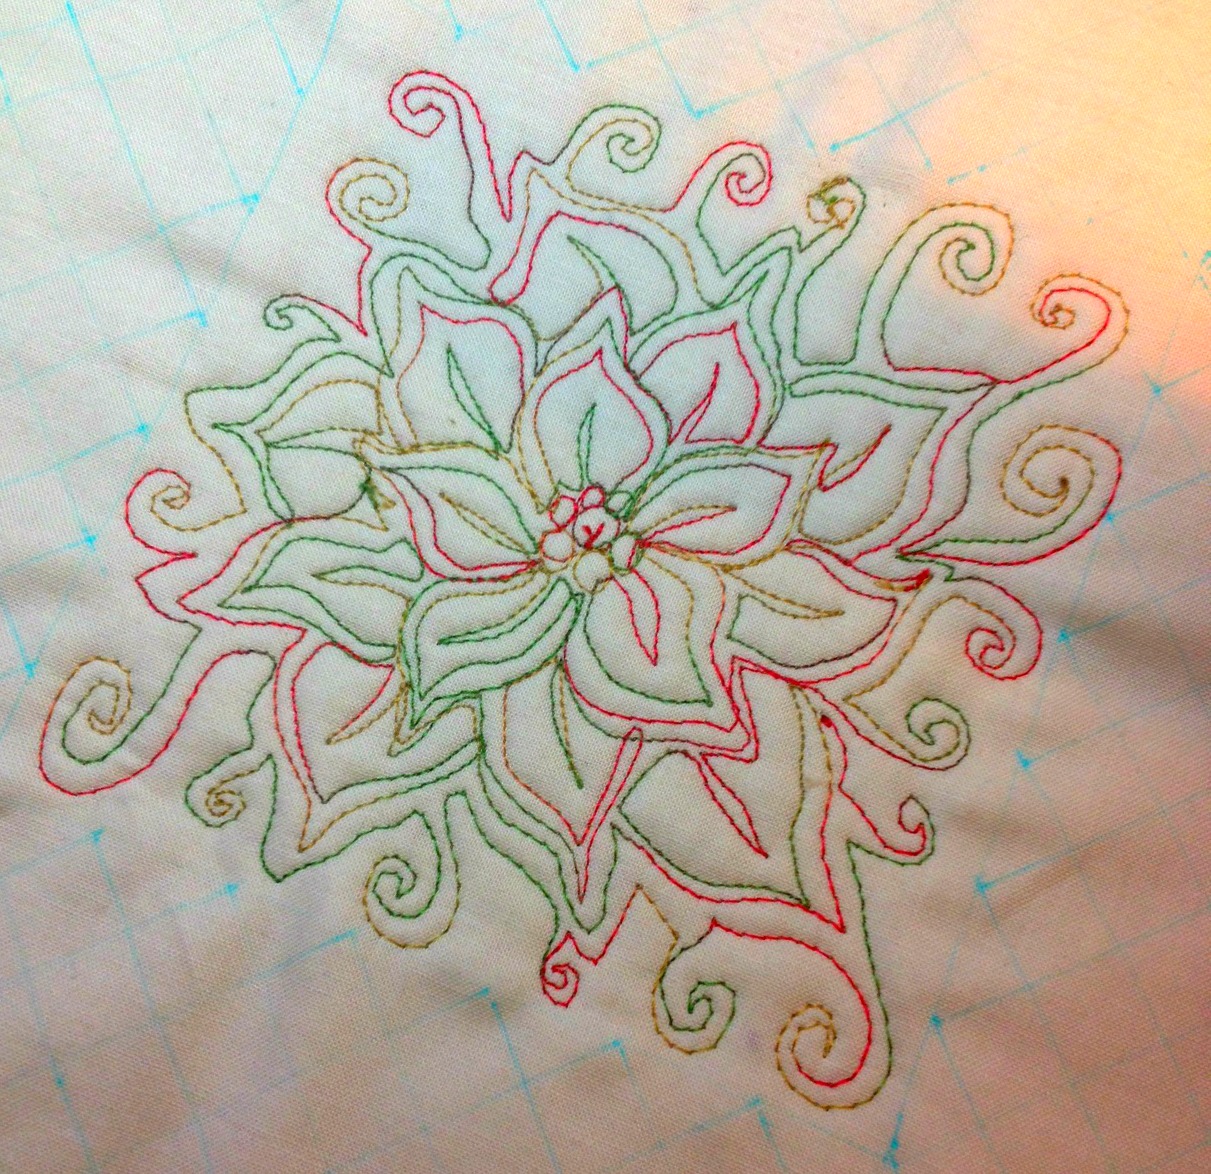
The first motif to quilt was the gorgeous poinsettia in the center. Here is a link to Lori's tutorial for the poinsettia motif.


I doodled it first to get a feel for the motions of sewing it. The hardest part of this motif for me is the curly cues around the outside. I had to go really slowly drawing them so that is a good heads up to slow down when stitching them, too. The poinsettia petals became a little challenging on the third round. I tended to want to make them much bigger when doodling them. I had to erase and try again with that part. The only other adjustment I want to make is with the veins in the petals. I like the pointy tip rather than the squared off tip for those. With my new found doodling knowledge, it was time to try stitching it.


There were a few thread breaking issues, probably because I was going extra slow for some parts. It is far from perfect but very pretty for a first try. I love how this motif turned out. It is so fitting for the holidays.


The second round of the composition is the grid pop. This is the grid. Grid pop is not for the faint of heart. There is a lot of stitching in this motif. It was a bit tedious to stitch, especially at a half inch scale. I used matching thread so that the texture would be the focus. The grid is drawn in blue water soluble pen. Rather than stay perfectly inside the frame, the goal was for each line to extend to the poinsettia to fill the space. That mostly worked.


The texture of grid pop is worth the effort. It frames the poinsettias perfectly.


The third round is Pretty Packages. Here is the link to Pretty Packages. This motif was really easy and fast to stitch.


The last round is snowflakes. I had this pretty icy blue thread selected for the snowflakes. I thought it would look nice with the border fabric. However, it was a wool thread, and after a few attempts at threading my machine needle with it, I gave up. The matching thread works just fine for this motif. Here is the link to Snowflakes.


The border fabric is stitched with a simple free motion wavy line.


I finished it with an envelope back so that it could be used as either a small quilt on a table or wall, or as a pillow cover. This project is going to be a gift so I like that there are choices for how to use it.


Lori Kennedy is a wonderful instructor. Now that I am through the class, I have already gone back several times to look through the Ideas and Inspirations section at the end of each lesson. She shows some really pretty quilts and I plan to use many of her ideas as a starting point for my own quilts.

Divide & Conquer: Creative Quilting for Any Space


I can't wait to share more projects from this class with you.


Linking up with Fabric Tuesday at Quilt Story and Work in Progress Wednesday at Freshly Pieced. Also Finish It Up Friday with Crazy Mom Quilts.

Monday, October 19, 2015

Quilting Practice from Craftsy's Divide and Conquer Class


Divide & Conquer: Creative Quilting for Any Space
Click on the class picture to sign up!
This week I started taking a class at Craftsy. It is the Divide and Conquer class taught by Lori Kennedy who blogs over at The Inbox Jaunt. I don't take classes often but when I do, I seem to be drawn to free motion quilting classes. Free motion quilting is something I really enjoy because the possibilities seem endless. It is also something I get really nervous about if I haven't done it in a while. Practice, practice, practice. That is always the rule when it comes to free motion quilting. And no matter how many classes I take, there is always more to learn. Different tools, new tips, new quilting designs.


Lori's class takes a look at different ways to divide space when planning the quilting design. The first composition she teaches is rows. She demonstrates waves, a sun motif, and sailboats. I decided to attempt the waves. Just in case you weren't sure, those are definitely waves in the gray. Squint if you have to. My waves need more practice and it didn't help that my row wasn't straight. I had to improvise a bit with the ups and downs. But not too bad for a first try.


I really like watching Lori demonstrate each motif. She does a good job talking through the details for each one. As an example, those waves have several places where, if you aren't careful, you can end up with a lot of stitching in one place, which can become distracting. It is one of those things I wouldn't notice in the details of stitching a single motif, but it does make a difference in the overall look of the project. That was a great tip.

I like the way this design looks on the back of the block, too. I knew that it would be difficult to see any quilting on the printed fabric, so I used that opportunity to practice some straight line quilting.


The threads I used were from those I had on hand. All worked well. I had a few broken threads when the weight on top was different than the thread weight in the bottom. That has always been a challenge for me but it is one that is usually overcome with a little bit of trial and error.


The blocks I am using for quilting practice come from another Craftsy class, the 2012 Block of the Month. I really liked that class, too, but did not want to put all my blocks together sampler style. I have been slowly using them for various free motion quilting practice, and will probably finish them individually. They may hang as a set someday.

The second way Lori divides composition is in a grid format. She offered several grid style quilting motifs and my absolute favorite is the square flower. I love how nicely it fit in the four corners of this star block.


I stitched one up in the center square, too, but that busy fabric makes it hard to stitch and impossible to see. I made up the curved lines in the triangle blocks and can see that I need to either embrace my whimsical, wonky, imperfect style or I need to practice a whole lot more. I'll take a mix of both, thank you.


I really like the way this block turned out.


There are eight lessons in the Divide and Conquer class. I am half way through the class and cannot wait to learn more. The remaining four lessons cover medallion composition, radiating composition, diagonal composition, and framed composition. There are still motifs from the first four lessons I want to try.

Lori also encourages doodling before quilting to get a good feel for the flow of the design. I have been a big fan of doodling for quite a while.

If you are interested in improving your free motion quilting skills, then consider this class. It is not a class intended for a beginner but is perfect once you have the basics down. This class is a great way to stretch your free motion quilting muscle.

You can register for the class here:

Divide & Conquer: Creative Quilting for Any Space


Linking up to:
Design Wall Monday at Patchwork Times
Monday Making at Love Life Quilt
Main Crush Monday at Cooking Up Quilts
Fabric Tuesday at Quilt Story

Other posts that feature free motion quilting:
Doodling to Improve Free Motion Quilting
Mother's Day Gift Making - Improv Pot Holders
Quilting Practice - Swirls
Quilting Practice - Leaves
Quilting Practice - Circles

Saturday, March 30, 2013

Quilting Practice - Paisleys

This week I used another pieced block from the 2012  Craftsy Block of the Month for quilting practice.


Paisley practice from Angela Walters Quilting Negative Spaces class was the goal. Before getting started with the paisleys, the center needed some quilting.


Those flowers in the center were worthy of some special attention so I outline quilted around them, then filled in the rest with a small meander.


I think that if I had it to do over again, I might have chosen a darker thread. This was a Sulky Blendable that was in my thread stash.


Once the center area was quilted, it was time to quilt some paisleys!


These were fun and easy to quilt. I like that the shape is smooth and flowing so it was easy to get into a rhythm.


I'm not sure how paisley-ish these look; raindrops or teardrops might be a better description. 


It's nice to practice on such a small piece. I found myself spinning the block around often in order to hit the paisley at just the right angle. I wouldn't be able to do that with a big quilt.


Here it is from the back. The stitching is easier to see with the contrasting color.


I'm happy with the way this block turned out.


Next time I practice, it will be time to start experimenting with combining designs...circles and swirls maybe.
Related Posts Plugin for WordPress, Blogger...