Sunday, August 26, 2012

Cleaning Things Up

I spent this weekend cleaning things up. The blog has been spiffed up with a new header and my original patterns have been added to the sidebar with direct links to my Etsy shop.

The inventory from my closed brick and mortar shop is moving out the door at a steady pace. Thank you to everyone who has helped with that. A common theme among former shop owners I have talked to seems to be the basement or garage that is full of old inventory. I am determined not to be one of those folks and my goal is to have everything sold by the end of the year. Here's all that remains:


Cleaning up also has me thinking about what I want to do next. I love this wonderful world of quilters and I want to find a way to continue to be more than a by-stander in the industry. At the same time, I have to find the right balance of work, play, and family. This has been a year of rest and reflection for my quilting life, and it may take another year of exploration before I decide where to land. And hey, even though I'm restless right now, I may decide that this spot of blogging, quilting, and sewing is just enough and exactly where I want to be.

Wednesday, August 22, 2012

NYB Progress - Four More Finished

So, my handy assistant has turned into a bit of a stern supervisor, monitoring my progress and making sure I'm staying on task so that he can pick the next group of fabric on schedule. It's all good, though. I like the extra accountability, even if it is to an 11-year-old.


Here's the next group of four blocks. This block design is my favorite so far. I like the angle of the star points and also the dimension added by using two fabrics. There are only two more groups to make. Eight blocks. It is very exciting to be this close.


Now it's time to start thinking about how I'm going to quilt this baby. I don't want to quilt anything that distracts from the blocks and at the same time I don't want to be a wimp and quilt in the ditch just to get it done. Maybe this weekend I'll put pencil to paper and experiment with a few designs.

Sunday, August 19, 2012

Weekend Sewing - A Lunch Tote, Headband, and NYB

It's always a good weekend when the commitments are minimal and the majority of my time can be spent in the sewing room. My big project for the weekend is this insulated lunch tote.


It is adapted from this tutorial. I'm happy I made it, but if I did it again, I'd do so many things differently. I put clear vinyl on the inside to keep any condensation from soaking through. It was very difficult to sew with. Since it stuck to my sewing machine, I had to add a layer of paper underneath so it would slide through my machine, then tear the paper away after each seam.


Then, the inside edges aren't finished. I know how to make a finished lining for a bag, and I should have adjusted the instructions so I could do so with this project, but the lazy in me took over and just went with the basic instructions.


The insulator fabric I use is Therma-Flec and it is just fabric; there is no batting attached to it. What that means is that every surface of this lunch tote has outer-fabric-insulation-batting-insulation-inside-fabric-vinyl. That is six layers, so when sides are being sewn together, it is TWELVE layers. I used my walking foot so that helped some, but wow, what a workout it was getting this put together.


On the positive side, the color combo is perfect. The tutorial called for a buckle but I didn't have one. I like the button and ponytail holder alternative. I like that it is insulated. It's pretty roomy, too. It should easily hold several food containers and a couple of ice packs. It is seven inches across the front, six inches deep, and nine inches tall.

Because this project was a bit challenging for me, I worked on a couple of smaller things in between. This headband was made using this tutorial.


The tutorial called for 5 1/2" of elastic for the base, but I ended up needing 7 1/2". Either I have a big head or I like my headbands to have a more relaxed fit. This was fast, easy, and a great way to use up scraps. I plan to make some more of these and may play around with using orphan blocks and other pieced scraps for them.


I'll also play around with the width. I like this width for showing off the fabric, but something narrower might suit my taste a little better.

My college son came home for the weekend and asked me to do some repair work to his favorite blue jeans. Some of the holes were starting to become more revealing than he liked.


It's hard to see here but those holes around the back pockets are big enough to easily stick a finger through, and they are becoming thread bare all over. They won't last much longer no matter what I do, but I did add a panel behind the holes so they would see him through a few more weeks of wear.

Not glamorous, but definitely functional. I also had to resew one of the belt loops. It's funny how I will spend hours happily sewing small pieces of fabric together, but the second it is called "mending", it isn't fun anymore.

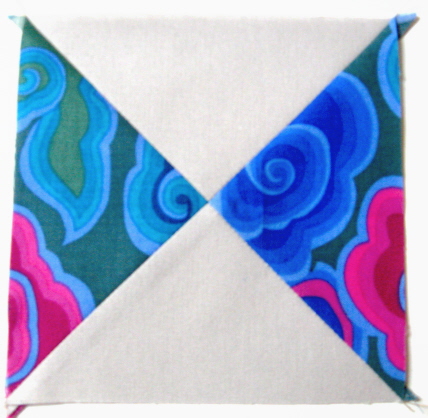
Last but not least, my Saturday New York Beauty block. Sunday's is cut out and I hope to get it sewn before the day is done.


The sewing room is in need of some tidying up after all this weekend sewing. There are a few threads, scraps, and sewing tools scattered about the room. Time to clean it up so we can start again.

Friday, August 17, 2012

A Handy Assistant

Now that school has started, our family is getting back into a more regular routine. My 11-year-old started middle school this year and, since middle school starts later in the morning, he and I have about twenty extra minutes together each morning. Last weekend, I sorted fabric groups to finish up my New York Beauty blocks. At that time I had finished 23 out of forty blocks for the quilt top.
He asked if he could help so I put him in charge of deciding which fabric group would be sewn next. It's been great. He selects the fabric, I decide the color placement within the block, and usually get all the parts cut before he leaves for school and I go to work.
In the evening, I sew and press the block, get approval from my assistant and add it to the design wall. I've managed a block a day with his help. So, as of today, there are 28 finished blocks and 12 to go. Here's our progress for the week.
Everyone needs a handy assistant. I sure am enjoying mine.


Tuesday, August 14, 2012

New Fabric is Good for the Soul

This year is all about using my stash. But sometimes a little taste of new fabric raises my spirits. I visited the Sewcial Studio on Saturday. It's a really cute shop in a renovated warehouse area in Athens, Georgia. To get to the shop, you enter through the nondescript green door just to the right of the big warehouse sign. There's a winding hall with various studios on either side of the hall. Sewcial Studio is on the right and has recently expanded to fill two studios.


The owner, Anita, carries some of my fusible kits in her shop, so technically I was delivering an order to her. However, there's no such thing as crossing the threshold of any quality fabric shop without purchasing a little something. It's a very small space, and Anita has done a fabulous job organizing and displaying her merchandise. It is warm and welcoming, and of course, Anita always greets you with a smile. I didn't take my camera so I don't have any inside pictures. Maybe next time!

My family was with me and it's my birthday this month, so my sweet daughter offered to buy me two fat quarters as a birthday gift. So really, I didn't buy any fabric, but I came home with some anyway!

These have been laying on my sewing table inspiring me while I work on other projects. It's the colors that appeal to me with this fabric. Citron and gray...just yummy. Today, I figured out what I want to make with them...a lunch tote. I'll be all sassied up taking a cool lunch tote made with these great fabrics. That may be a project for this weekend.

Sunday, August 12, 2012

New York Beauty Progress Continues

I finally found some time to spend with my New York Beauty quilt. It started as part of a quilt along. The quilt along has been over for a while now, but I keep plodding away on my quilt. There are ten different blocks and I plan to make four of each.


Here's my progress so far. Twenty-three blocks finished, seventeen to go. This is not the final block arrangement; it's just how I happened to put them on the design wall this time. I made one block today (the top right one) and then decided it would be fun to choose fabric for the rest of the blocks.


It took all afternoon to settle on all of these groups of four fabrics. I took this picture while the light from the window was still bright enough, so there were a few more groups selected before the day was done. This quilt is being made entirely from my batik stash and I'm also trying not to have too many repeats throughout the project, so fabric choice was a fun challenge.

Now that all the fabric choices have been made, I'll be able to sit down and start sewing on this project right away. Stay tuned for more New York Beauty.

Thursday, August 9, 2012

Playing with Half-Square Triangles

As the lucky winner of a random drawing, I recently received two sets of of 6" squares from Amy Butler's Gypsy Caravan and Free Spirits Essentials. Thanks Sweet Diesel Designs!


I just love all things Amy Butler and couldn't wait to stitch something up with this fabric pack. There were thirty squares and I wanted to do a little more than sew them together. I decided to make half square triangles with them by adding a light background fabric. Getting two blocks out of each square would expand my options for getting to a finished project.


Once they were put together, I was able to square them up to 5 1/4". Then I started playing on the design wall. It was fun trying different layouts and there weren't any that I didn't like.


Some looked very traditional while others had a more contemporary edge.


 I finally settled on this design...

The top is pieced and waiting to be quilted. Now I have to figure out how to finish it. I thought about adding wide borders to the short sides and turning it into a bed scarf, and I also like it as a wall hanging. I asked my husband what to do with it and he said, "Begin with the end in mind." I'm all for the teachings of Stephen Covey, but that statement very rarely applies to anything I do in the quilting world. I make it because I love it, then I figure out what to do with it. I'll ponder the future of this project while I'm quilting it.

Sunday, August 5, 2012

Craftsy BOM August - DONE!

This month over at the Craftsy.com Block of the Month class, we're making star blocks. I've said it before and I'll say it again...this is a great class and it is free! I talked to a friend this weekend who has no intention of making the quilt, but enjoys the lessons as skill builders. She hasn't been quilting for long, and this is a good way to pick up new skills and practice old ones. Another good part of the class is that you can watch the videos over and over again, and can make notes throughout the video using time markers. That makes it easy to get to the part of the video you most want to see again.


The first block this month is a traditional Ohio Star block. This was a good chance to practice quarter square triangles. I like making quarter square triangles but I'm always nervous that they are going to end up too small. To overcome this, I always use a seam allowance that is much less than the usual quarter-inch. I should of put a ruler on this, but here's the back of my block. Hopefully, you can tell the seam allowance is super skinny.

One of my favorite parts about making these is how the center points nest together so nicely. If you've done a good job pressing, it's hard to mess up the center point.
Each of these units should finish to 4 1/2". You can see how much bigger my block is than the finished size, and that's okay with me. I can trim it down to be a perfect 4 1/2" with the center point exactly in the center.

I'm using my favorite ruler, Creative Grids. Since I know my finished block is 4 1/2", I know I want the center point to be exactly in the center of that, which is 2 1/4". I can also make sure it isn't wonky by placing the 45 degree line right down the diagonal seam.

There are other techniques for making quarter square triangles spot on, and the extra squaring up step does take extra time. I like to sew for fun and I don't want to sweat being perfect with each and every step. The extra squaring up step gives me the ability to have fun and know that I have room for error.

I'm happy with my fabric choices for this block, even though I'm getting bad to mimic what is shown in the pattern illustrations rather than venturing out into my own color choices. The only concern I have with my finished block is that I stand a chance of losing some of those outer points when I put it all together. They are very close to the edge.

The second block this month is called a double star and it's a star in a star block. This block used lots of Flying Geese units. There are several methods for making these, and the method used in class is probably the first one most quilters learn. It is the method of laying a square on a rectangle and sewing a diagonal line. You can see the details in the class video. For this block, keeping your seams a scant 1/4" rather than a full 1/4" will help make sure the end result is the right size.
It's really hard to see here but I tried to sew just outside the pencil line rather than spot on the line. And then I added a trick I learned from Bonnie Hunter over at Quiltville.com. She goes back and sews a second line a generous 1/4" away from the first line. When I trim the extra fabric away, I cut right between the two sewn lines. All those triangle scraps turn into nice 2" half square triangles that I can add to my 2" square scrap pile for use in another project. I love it when there's no waste!


Here's my finished double star.

The transition from the smaller star to the background is a little muddy, but I'm okay with that. It is nice to be caught up with this project so early in the month. It will be an exercise in patience waiting for the September instructions to be available.


While I wait, I plan to spend some more time working on my New York Beauty blocks, along with a few other projects that have caught my eye.
Related Posts Plugin for WordPress, Blogger...