Friday, December 8, 2023

Dog Bandana Quilt For Mom

 It has been a long time since I've made a quilt. I burned out for a while but recently found myself wishing for some time at the sewing machine. My mom's dog visits the groomer regularly and each time she comes out with a cute bandana. Mom had been saving them for years and asks me to make a quilt for her. I've been holding on to them for a while and I'm sure Mom has either forgotten about them or at least thinks I'll never sew again. This was the perfect project to refresh my quilting and sewing spirit.


Here are all the bandanas. It's a mismatched bunch for sure.


Here's a little closer look. I tried to sort them dark to light to begin thinking about what I wanted to do.

This was going to have to be a super scrappy pattern to make this work. I recalled something that Bonnie Hunter often says... if the fabric is ugly, just cut it smaller! So, that's what I did. I went with a pattern from Bonnie's Free Patterns! page. It is Oopsie Daisie and was so much fun to make.


The first picture shows some of the blocks and the second picture shows all of them with my foot to help with the size. It's not a big quilt but very bright and fun. All of those bandanas get along great in this quilt.


I was out of basting spray so I pin basted the layers together and machine quilted a simple cross hatch pattern. I was happy to find such a cute paw print pattern for the back.


I had to make a fun label for the back with Kaylee's name on it.


Our cat, Bruce, approves, although he might not if he knew there was a dog involved!


Here's the finished front and back and a small photo dump below. I'm saving this to give to her as a Christmas gift. She will definitely be surprised!


Monday, December 16, 2019

Baby Girl Quilt for Olivia


This commission quilt was made for a coworker and friend who is expecting her first grandchild. One of the requirements was that it not have too much pink as the mom is not fond of all pink for her baby girl. However, purple was most definitely acceptable and I was fortunate to find this cozy cotton flannel fat quarter bundle by Studio RK for Robert Kaufman. Another request was to personalize the quilt with the baby's full name. I "purpled out" the last name for security reasons. 


Typically, I print a label onto fabric using my inkjet printer but the printer is permanently out of service so we went for something a little more rustic. I hand printed the message using a fine point Sharpie on a white broadcloth. It is a square of fabric folded on the diagonal and stitched into the binding. The printing is off center on purpose so that specific birth information can be added later. I included a scrap of the white fabric for writing practice and some tips for writing on fabric.


The quilt design stayed simple since flannel is thicker than typical quilting cotton and I wanted to be careful not to create bulky seams. The name is fused and machine appliqued to the quilt top. Special thanks to Wendi at Shiny Happy World who offers a free applique alphabet called Shiny Happy Words. It was perfect for this quilt.


The quilt is machine quilted with flowers surrounding the name and a simpler meander over the rest of the quilt. If I were to do anything differently for this quilt, it would be to use something other than flannel for the binding. It was really bulky and difficult to work with.


Since I have been on a bit of a sewing break, it was nice to spend some time at the sewing machine for this project. Every sweet baby girl needs a special quilt to welcome them to this world.

Monday, December 9, 2019

Orphan Block Potholders

Making new potholders usually falls into my schedule in the January time frame when all the organize, renew, and refresh vibe is going around. It's okay that I did not get to this until November. My poor old potholders from two years ago got a real workout. There were holes and a few good burns on them.


These orphan blocks came from a fun quilt I made for my son during the brief period of time he was interested in learning to play the electric bass guitar. And it made for a great shop sample back in the day as well.


I love the colors and had a bit of fun with the quilting, making each one different.


They all have the same backing, a classic fabric by Kaffe Fassett.


Here's how I layer everything for one pot holder:

  • Fabric for the top
  • ThermaFlec
  • Batting
  • ThermaFlec
  • Fabric for the bottom 

Sometimes I'll even do two layers of batting, but not this time.


I have one more project coming before the end of the year. I've been much more focused on family this year and have been spending my creative energy making art that doesn't require me to go off to another room to create.

I hope you all have been sewing and creating up a storm this holiday season and are enjoying all the special people in your lives, too.


Sunday, June 23, 2019

Scrappy Neutral Quilt For A Master Bedroom


It is rare for me to make a quilt for a specific purpose in our home. I have wanted a new quilt for my bed for as long as I can remember. There is an old family quilt that has been on our bed in the winter for a number of years and this new quilt is a bigger, neutral version of that quilt.


Here's an old, blurry picture I found of the inspiration quilt. This quilt was made by my grandmother or great grandmother. There are some awesome fabrics in this old quilt.


 And here it is on the bed. I do love the mix of fabrics here but I needed a neutral and timeless quilt that would last through whatever crazy color scheme we wanted for our bedroom. This quilt also barely extends beyond the top of the bed so something bigger was needed.


Each scrappy panel finishes at 15 inches wide The quilt top is made purely from stash. It used up almost all of my neutral stash. There are six scrappy panels so the finished dimensions of the quilt are 90 x 90. This is plenty big enough to cover our queen size bed.


I spent a lot of time debating the quilting design. Part of me wanted to go for simple vertical wavy or straight lines over the entire quilt. However, I would always think that I had taken the easy way out to go that route. Instead, I went for free motion quilting each piece with a different design. It was a lot of fun and took a really long time to complete. I would work on it for 15-20 minutes each day before work and then an hour or two over the weekend.


For some sections I quilted around the print motif like with these birds. There are lots of hidden messages in this quilt, too. In the panel just under the birds it says "LISTEN to the birds sing!"


The back is Kona Dusty Blue, which does work with the upcoming bedroom color scheme but is also neutral enough to stand the test of time. The binding is the same as the backing. The back of the quilt has a graffiti quilting look to it.


Of course, all those messages are mirror image on the back so you either need a mirror or a careful eye to decode them. The center right of this picture shows an "I love U".


Even the front newsprint fabric is spreading the message of love.


These pictures were all taken before the quilt was washed. Funny thing is my dryer died the day I finished this quilt. Impatient me washed it anyway and it is hanging out on the clothes line to dry. Those summer afternoon thunderstorms need to stay away today!


Here's another look at the quilting, this time with the message "More Dreaming". I lost track of all the messages in this quilt. It will be fun to run across them as this quilt gets used on a daily basis.


I'm really excited to be adding this project to the finished list. My interests have expanded a lot this summer with food gardening, bird watching, drawing, and painting. Other than a few smaller projects, my sewing machine might get a rest for a while. No matter what other interests develop, my heart is always with quilting so I know I'll be back.

Sunday, May 5, 2019

Two tutorials - Quilts from Shirts


The 
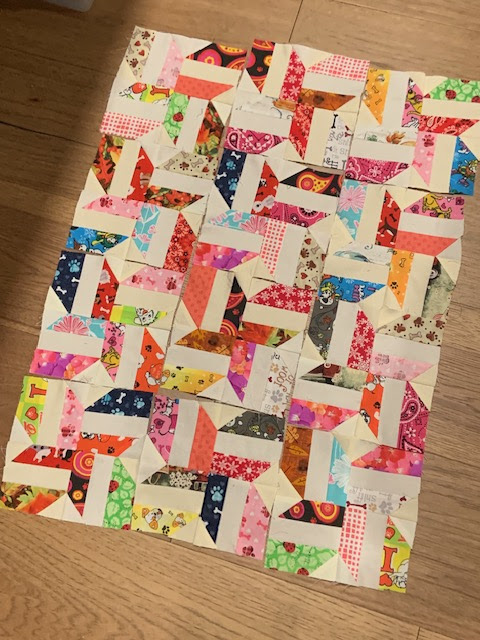
original post for these quilts was just over two years ago. This set of mini-quilts was made for a family of five siblings to remember their father. I've received several questions about reproducing the design for the first and third quilts so thought I'd share that information here so that you can make one, too.

One frequent question is about how to size the finished quilt to be bigger or smaller. Both of these designs are based on an eight block by eight block grid. In other words, there are eight rows of eight blocks. To determine your finished quilt size, decide how big the finished block size will be and multiply by eight. Here are some examples:

  • 2-inch finished block = 16-inch square finished quilt top
  • 3-inch finished block = 24-inch square finished quilt top
  • 4-inch finished block = 32-inch square finished quilt top
  • 5-inch finished block = 40-inch square finished quilt top
  • 6-inch finished block = 48-inch square finished quilt top
  • 7-inch finished block = 56-inch square finished quilt top
  • 8-inch finished block = 64-inch square finished quilt top
  • 9-inch finished block = 72-inch square finished quilt top
  • 10-inch finished block = 80-inch square finished quilt top
  • 11-inch finished block = 88-inch square finished quilt top
  • 12-inch finished block = 96-inch square finished quilt top
  • 13-inch finished block = 108-inch square finished quilt top
  • 14-inch finished block = 116-inch square finished quilt top
That should cover every size from a mini-quilt up to a king sized quilt. The quilts hanging on the line are 24-inch quilts which means they have 3-inch blocks.

Here is the simple grid for both quilts. Forgive the low tech drawings. You would think that since my day job is all about technology, I would up my game but I really love the simple process of graph paper, ruler, and pencil.


Let's figure out the design breakdown for the first quilt. It is based on the traditional jewel box pattern which is made up of four-patch blocks and half square triangles.


It is a two value quilt, using dark and light fabrics. In my version, the dark is scrappy from the shirts and the light is a Bella solid (ivory maybe). If you look closer, the dark value is really both dark and medium values. I could get away with a wider range of values since my light was very light and also consistent within the quilt.


Each quadrant of this quilt is exactly the same so make one and repeat three more times. The upper left quadrant is drawn out for you. Each quadrant consists of eight half-square triangles and eight four-patch blocks. For three-inch finished blocks, each square in the four-patch blocks should be cut to two-inch squares. Here's the math for that:

    Finished block size divided by 2, then add half an inch = cut size of squares for the four-patch unit.

And a couple of examples:

    Finished block size = 4 inches
    Divided by 2 (or take half if that's easier for you to think about) = 2 inches
    Add half an inch = 2 1/2" cut squares for the four-patch block

    Finished block size = 7 inches
    Divided by 2 = 3 1/2 inches
    Add half an inch = 4 inch cut squares for the four-patch block

There are many great tutorials out there for half-square triangles, so go to your favorite or check out this one for help making those.

That's all there is to it. 


Now let's take a look at the third quilt hanging on the line. In one way this quilt is easier and in another it is more complicated.


It's easier because it has simpler units. It is solid squares and half square triangles. It's more complicated because it uses three values: light, medium, and dark. The layout is a little trickier too only because it's easy to turn one of those triangle units the wrong way while sewing the blocks together. 

Here's the grid for this one:


For the grid, L means light value, M means medium value, and D means dark value. Because I was working with shirts and had a limited colors/values available, this design was a bit tricky, but it worked out just fine. I had to be careful of placement for those fabrics that could pass for more than one value. The stronger the value, the stronger the design stands out for this quilt.

It's a busy drawing so here is the break down of the blocks you need:

    Light squares = 20
    Medium squares = 12
    Half square triangle blocks with half light, half dark = 20
    Half square triangle blocks with half medium, half dark = 12

We covered how the block size determines the quilt size way up at the beginning of this post and I've also shared a link to my tutorial for making half square triangles. Here it is again just in case you skipped over the instructions for the first design and came straight to this one.

With these details, you should be ready to jump in and make your own version of this quilt, too.

I love how simple squares and triangles can be put together to make thousands of designs. Have fun creating your own quilts and please let me know if you have any additional questions or need more details for either of these quilts.


Sunday, March 31, 2019

Eight Shirts, Three Quilts

Last fall, I made two memory quilts for a coworker who lost her brother. She gifted those quilts to her mother and her sister-in-law. You can read about those quilts here. As soon as she shipped them off she started wishing she had one of her very own. Luckily, there was just enough shirt fabric to make one so that she would have her very own quilt to keep close.


If you look closely at this quilt, you will know which of the shirts were long sleeve and which were short sleeve. It was a challenge to even get one block out of a couple of these. I am very thankful for long sleeves for this project.


I had to use the pocket front for all but one of these shirts. The pockets could have been left unquilted but she requested them stitched down so a hand or foot would not get caught and tear the quilt. It would be fun to leave them unquilted if this were going to be hung on a wall, You could keep special notes or other memories in the pockets.


The backing is navy flannel just like the other two quilts. The first two quilts each had one of these photos on the back. This one has both! It will be easy to flip up a corner to see the picture. This photograph also shows the scrappy binding. I was not sure there was going to be enough shirt left for a binding, but there was. The binding scraps frame each of the pictures on the back.


All of the pictures are after the quilt was washed. The quilting is a simple meander in an off white thread to match the background fabric. This quilt was delivered earlier today and I could tell she was very happy to receive it.


I couldn't help but take a picture of our back yard bird set up. It's been so active lately, except when I scare them all off taking quilt photos.


Eight shirts, three quilts. So happy to have been a small part of saving these memories.

Related Posts Plugin for WordPress, Blogger...