Showing posts with label scraps. Show all posts

Friday, October 9, 2015

Cradle Quilt - A Work in Progress


After making the Funky Quarter Cabins quilt last week, I had a few scraps on the cutting table.


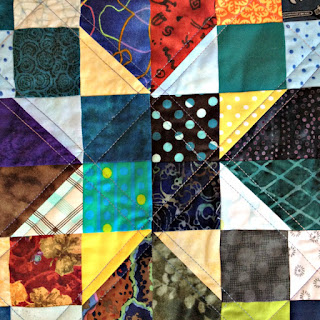
Rather than put them away, I decided to see what else I could make from them. There were two fabrics that I was quite fond of that did not make it into the first quilt. That is where I started. There was a fat quarter of the orange and odd scraps of the dot. Both were cut into as many 2 1/2 inch strips as they would make. The strip sets were cut into 2 1/2 inch segments and cute 4-patch blocks were made.


There was enough fabric to make 25 4-patch blocks. To complement the 4-patch blocks, 4 1/2 inch squares were cut from most of the remaining fabrics, enough so that each 4-patch had a 4 1/2 inch square to go with it. Then I started playing with the layout.


It didn't take long to figure out that 50 blocks didn't work out to a very good layout so I ended up using six blocks across and eight blocks down. There was only one 4-patch that was left behind. The finished size of this quilt will be 24 inches x 32 inches which is fairly small.


Small is perfect for a cradle, stroller, or car seat. And I can see a child getting attached to a quilt of this size and carrying it with them everywhere until it fell apart. I always wish that for my quilts. I want someone to love them until they are completely worn out from all the love they have been given.


The plan is to quilt and finish this one next week.


The goal is to not straight line quilt it. Maybe concentric circles or random loops would be the right thing.


Now I think I can put away the rest of these scraps.

Linking up with Finish It Up Friday over at Crazy Mom Quilts.

Other projects with a focus on squares:
Lost My Marbles - A Finished Quilt
Blue Nine-Patch Quilt
Quilter's Bingo


Saturday, September 5, 2015

Oklahoma Backroads - A Finished Quilt


Back in June, I had a bit of a scrap attack which resulted in four quilts in progress. This is not the one that I would have guessed would be finished first, but once I got rolling on it, I was hooked. It is the Oklahoma Backroads free pattern from Bonnie Hunter. The exciting part is that all of the fabric in this quilt were small pieces that could just as easily been tossed in the trash. It is bright and colorful and I just love it.

Here is the block. The traditional block is called Oklahoma Crossroads but since Bonnie reversed the placement of the dark and light fabrics, she cleverly named it Oklahoma Backroads. Once the blocks are arranged, there are some great secondary designs.


There was no holding back on the types of fabric used: traditional, modern, batik. All were welcome. The one adjustment that I did make was to be more strict in the dark and light values. After a few blocks, many of the mediums were kicked out and found a new home on the back of the quilt. The design on the front became muddy when too many mediums were in the mix.


Because the blocks are so busy with color and pattern, the quilting is simple and straight line. Each diagonal line formed by the triangles is quilted a quarter inch away from the seam. Once that was completed, one more diagonal line was added through the center of the big squares formed by the double line stitching. Rather than quilt the border with a different design, the quilting lines from the center flow onto the borders.


The border is a Nancy Halvorsen print. It frames the quilt without overwhelming it. The binding is dark with touches of color that is not overly busy. The goal for both the border and binding was to frame the quilt, balance out the busyness of the center while not being too plain and boring.


The back is a red and white calico. This fabric was given to me by a friend along with the inverse print. I am sure I had a dress made out of something very similar when I was a little girl.


The finished quilt is 46" x 61". This quilt is for sale in my etsy shop.

Linked up on Scraptastic Tuesday over at She Can Quilt.


Monday, July 6, 2015

Scrappy Strip Quilt Progress - Choosing a Layout


After a nice long weekend with all of my children in one place (which is becoming a rare thing), I returned to my sewing room to see just how much work the quilting fairies did while I was away. What!? Nothing? That just means there is more fun for me.


There are still plenty of strips to sew together. I'm finding this to be quite therapeutic. It makes me almost giddy to put two of the most unlikely candidates side by side and sew them together. Take that you fabric strip. Bet you never thought you would be sewn next to this guy. Hahahaha (that is my evil laugh...just go with it, okay?).


I have sorted the strips by length to reduce the waste of dangly longer pieces. Once a set is sewn together, I cut them into 3 1/2" strip sets. For the blocks, I'm using the instructions from Bonnie Hunter's Diamond Strings quilt.

I set aside a bin to hold all of the blocks and now I have enough to figure out a layout. I found a great link over on Pinterest for half square triangle quilt layouts. I took four favorites and gave them a test run.

First up is a layout that has a jewel box feel to it.


Second is this layout that has a repeating ohio star throughout.


Third is a layout that gives the strips a chevron look.


And last is this vertical layout of slanted parallelograms.

The winner is... the first layout. The strippy scrappy triangle add a level of busyness that calls for a larger design and the jewel box gives it just that. Your eye has a place to rest while still yielding a bright and colorful quilt.

For the next little bit I'll keep sewing strips together to see just how big this quilt is going to be. And you know what...taking all of my scraps and sewing them into beautiful quilts is doing something I didn't expect. It's making more scraps! There is something really wrong with that. At some point, there are going to be pieces small enough to throw away. Not yet, though! I already have ideas for these new scraps.

Saturday, June 27, 2015

About That Day I Was Taking A Break From Sewing


One day last week, I found myself caught up on all my sewing commitments. I put away all my rulers and cutters. My sewing table was completely clear for the first time in forever. I even put the cover on my sewing machine, something that rarely happens. I left the room confidently, saying to myself...I'm going to take a break from sewing.

All was good that day. I had plenty to do and did not give sewing any thought at all, except maybe I thought about my scraps a little. Just a little. Maybe my next quilt should be one of Bonnie Hunter's scrap quilts. I've always wanted to make one of her patterns. It was a passing thought.

The dog crate is in the sewing room. I was only going into the sewing room to zip up the dog for the night. And then I thought, well, while I'm up here I should take a look in my scrap bin, you know, just to see what's in there. Wait, where did that come from? I didn't know I had started a second bin for scraps. When did that happen?


As you can see, my sewing table did not stay clear for very long. And I became hugely inspired by all these ridiculous, I mean, beautiful scraps. I sorted and ironed and planned. And now I have, ahem, four quilts underway from all these scraps. My sewing table looks a bit like a boxing ring.


In the first corner, coming in with 2 1/2" squares and 2 1/2" x 4 1/2" rectangles, we have Oklahoma Backroads.

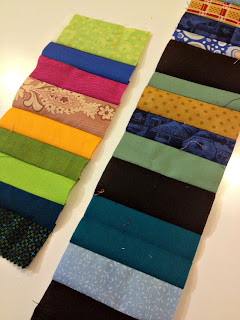
In the second corner, we have strips being sorted by length.

The strips seem to be winning at the moment, on their way to becoming a strippy diamond quilt.

In the third corner, the 2 1/2" strips are becoming a scrappy trip around the world quilt.

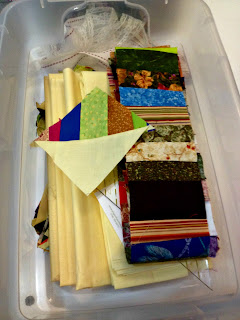
And in the final corner, we have the crumb and triangle bin, bound to become a beautiful crumb quilt someday. These poor scraps keep getting pushed to the floor to make room for other action on the table.

So much for a sewing break. It's okay. I really like the plot twist in this story. We'll have to wait and see what happens next as this sewing saga continues.

Monday, August 25, 2014

Scrappy Blue Kaffe Quilt Supersized


A few weeks ago I made the cute little quilt on the steps. I liked it so much that I decided to super size it and make a bigger one. Since these are stash buster quilts they ended up similar but not quite the same. The smaller wall hanging has more teal; the bigger one has more purple. 


The smaller quilt uses a light gray Kona solid throughout while the bigger quilt is full of scrappy grays.


The smaller quilt is quilted with diagonal lines through the gray squares. The bigger quilt has diagonal lines and also has vertical and horizontal quilting lines to enhance the bigger squares.


The back is Kona solid in plum.


Both quilts have a Kona solid binding. I don't know the specific color name but it is a pretty royal blue. Quilt making has become my focus these past few months. Soon, I will reopen my Etsy store to sell my quilts. These two will debut there. Look for more finishes in the coming months.


Wednesday, August 6, 2014

Scrappy Blue Kaffe Quilt

My fabric lives in open cubbies in my sewing room. It goes through various stages of organization and neatness. Here is part of it on a fairly good day.


After a while, after searching and sorting, stacking and restacking, it gets just a little messy and hard to work with. That's when it's time for a little clean up. Some days I need a break from sewing or cutting. Those are good sorting days. I recently sorted through all of my Kaffe Fassett fabric. It was very chaotic at first, but little by little it was all sorted by color.


Took two pictures to get it all in.


Usually, during this process, something starts to stand out. This time it was those rich blues. While everything else was neatly put away, those hung around on the cutting table for a little more thought.


And then I remembered some gray two inch strips that were cut for another project but didn't work. A little bit of scrap cutting and a little bit of design wall play and we have a new quilt.


I quilted it with simple cross hatch lines through the gray squares.


It's a small quilt, finishing at 22" x 25".

I like the result so much that I've cut pieces for a very similar quilt using four inch squares rather than two inch ones. It should make a nice size throw quilt. It's great to organize and stash bust all at the same time.

Friday, May 9, 2014

A Quilt for a Teacher


My daughter is just finishing her first year of teaching. She has had a year full of stories and experiences and there were a few people she wanted to say a special thank you to for helping her make it through. Her list started quite long but with the realization that time was catching up to her, she whittled the list down to three. Three quilts for three special people.


She came home for her spring break back in March thinking we would make three quilts together. And we tried...and managed to get two quilt tops completed.


Here is one of them. I didn't get a picture of the second one, and I don't even remember what it looks like now. She has already shared the tops and will be bringing them back home this summer to be quilted and finished. I'll get better pictures then.

With spring break at an end, there either wasn't going to be a third quilt or I was going to have to make it without her. We had already settled on a design so I started plugging away at it. The design comes from a Moda Bakeshop Pattern Mixed Bag by Studio m. I'm trying to use up my batik stash since I haven't been using those very much lately. This was the perfect quilt to help with that.


The pattern is meant for a jelly roll, which would have made it go together quickly. Instead, I spent a good deal of time sorting through and cutting scraps. It was well worth it though. I was a little nervous about matching all those seams when the vertical strips went together, but it was easy peasy since the seams were pressed in opposite directions.

To quilt it, vertical lines were quilted a quarter inch away from either side of each vertical seam. Then free motion sewing commenced with simple meandering on each vertical panel. I'll be shipping this quilt off later this week. It's always nice to say thank you with a quilt.


Related Posts Plugin for WordPress, Blogger...