

Today, I'd like to share more about my process of selecting fabric for a new project. There is no one size fits all formula for this so it is simply how I chose fabric for this quilt. Just like all things in life, being comfortable with fabric selection takes practice. For some, it is a very intuitive process while for others, it is much more defined, meaning there is much more thought put into value, scale of design, complementing colors, contrasting colors, and other "formulas" for getting just the right mix of fabrics for a project. I like to think of my process as a little bit of both.
------------------------------------------------------------------------------
Tip 1: Almost everything in life gets better and easier with practice, including choosing fabric for a quilt.
------------------------------------------------------------------------------
Here is the block design planned for this quilt. It finishes at 12" so the smallest square is 4". Always consider the size of the pieces to be used in a quilt when selecting fabric. Large scale prints will be lost if cut small (and sometimes that is the desired effect) while small scale prints might be lost in a large cut.

So much of fabric selection is personal taste. In the end, it is what you like that matters so try not to feel confined or restricted by what you believe you are supposed to do. Have fun. Experiment. I usually encounter a surprise or two with all of the quilts I make.
------------------------------------------------------------------------------
Tip 2: Consider the size of the block and the size of the pieces within the block when selecting fabric.
------------------------------------------------------------------------------
For this project, I knew I wanted to make a bold baby quilt. The starting point for this project is three large scale print fat quarters.

They were part of a larger bundle but I wanted to stretch my fabric selection muscle a little and try to add some pieces that were outside of the fabric collection. This is the first attempt.

These were pulled late at night so I took a quick picture and emailed it to myself. While at work the next day, I pulled this picture up on my computer monitor so I could study it throughout the day. At the end of the day, I marked my decisions and emailed it back to myself so I could play some more at home.

Why did some of these get kicked to the curb? For the tone on tone blue/teal fabrics, I decided that one was enough. There was no benefit of keeping the others and the one on the upper left was leaning a bit too much to the green side of teal anyway. The top center print, while great for color, was a large scale print that seemed to compete with the three main prints for the project, so out it went. The creamy print on the right...a bit too creamy. The bottom right print had a sketched feel to it while all the other fabrics had clear, clean designs so it just wasn't a good fit. The bottom comma print was too dark. The orange on the left was a bit too neon. It is actually a print that was part of the original fabric bundle but the boldness of the three main prints was enough for this project.
At this point, one of the things I thought this project needed was more light fabrics.
------------------------------------------------------------------------------
Tip 3: Rather than choose all of the fabrics in one sitting, walk away for a while. You will often be freshly inspired when you revisit your selections.
------------------------------------------------------------------------------
After another evening of adding and taking away, this is the final pull of fabric.

One thing to remember...what looks good as a collection of fabric may look far different once the quilt making begins.
------------------------------------------------------------------------------
Tip 4: Be willing to add or take away fabric as a project progresses.
------------------------------------------------------------------------------
Here is the beginning of the quilt layout. I had already spent time moving the focus prints around and was happy with their locations. The next step was to choose the fabric to go with the focus print in each block. None of the pieces are sewn together. It is on my design wall, which is an insulation board covered in flannel. The pieces stick to the flannel fairly well so it is easy to move things around.

The last block on the second row doesn't even have anything with it yet. After spending a couple of hours working on it, I decided to leave it overnight (it was getting late) and look at it with fresh eyes in the morning.
After another hour or so of playing the next morning, the layout was complete.

Let's look at them side by side to better show the differences.

What changed? There are two big changes that happened while laying out the blocks. First, the dark green tone on tone print was added. This was a surprise. I was so determined to keep this quilt light and whimsical that I would not even consider any dark colors. At first, before even cutting into this fabric, I pinned the dark green fat quarter randomly to the design wall and stepped back. It instantly added just a touch of warmth to the project. The second surprise was that I cut back the number of light prints in the project. All the variety seemed to make it too busy. In the end, there is only one light fabric in the quilt and I love the way it looks.
Here are the fabric pulls side by side. The first shows what I thought would be used in the quilt and the second shows what actually was used in the quilt.
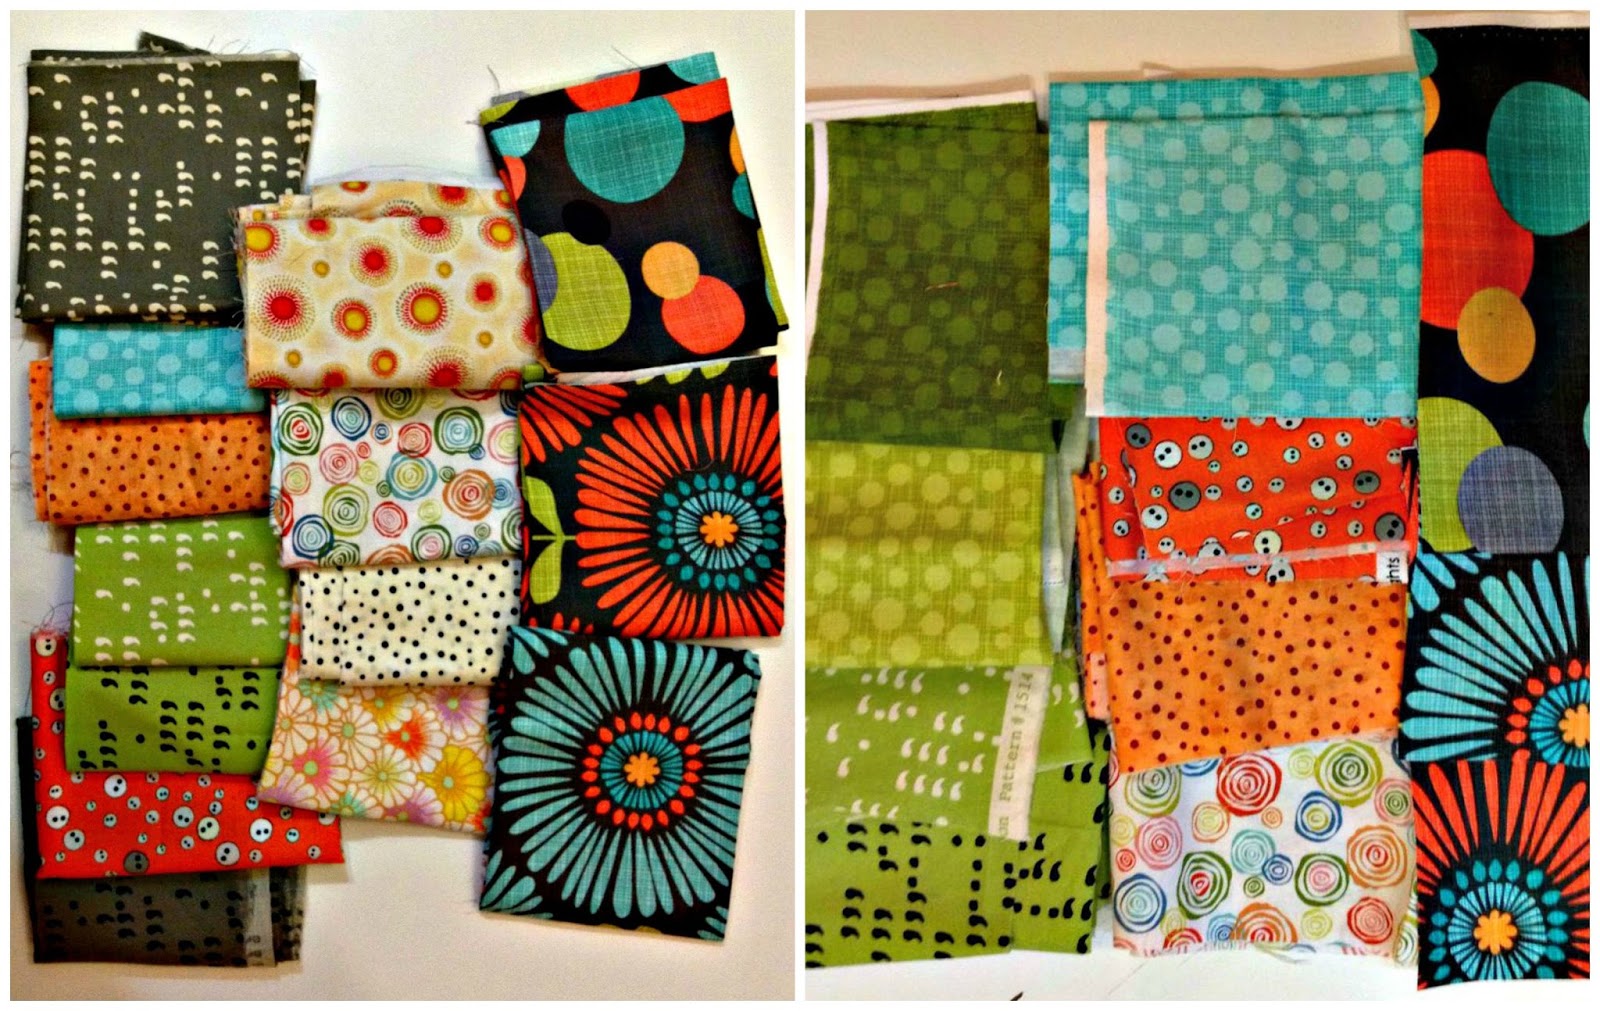
In the final version, six of the fabrics are from the same collection. Five are from my stash. I am happy with the mix.
When making simple, large scale blocks, it is a good idea not to piece each block until the final layout is determined if possible. It was tempting to pair up the fabrics in advance and then figure out the block layout. Sometimes that works out and sometimes it doesn't. It can be frustrating to keep changing the layout to keep too many things from being too close together only to find you have created another problem. It becomes sort of like trying to solve a Rubik's cube puzzle.
------------------------------------------------------------------------------
Tip 5: For simple, large scale blocks, consider the entire quilt top rather than just one block at a time.
------------------------------------------------------------------------------
Once the design was completed, the quilt top went together quickly. I hope to share a finished quilt and a tutorial for making it on Friday.
Other posts of interest regarding fabric selection:
Patchwork Prism - A Finished Quilt
Scrappy Strip Quilt Progress - Choosing a Layout
Linking up with WIP Wednesday over at Freshly Pieced.
Great tips Debora...you always were good at picking fabrics!!!
ReplyDeleteAww, thanks Frances!
DeleteCute fabrics, cute quilt. I like your idea of sharing how you chose the fabrics, that was interesting.
ReplyDeleteThank you! I love reading how other quilters choose fabric so I thought it would be fun to share my process, too.
Delete