Tuesday, December 19, 2017

Magic Parade Letter A Hexie Pillow


As much as this quilting grandma wants to make a quilt for every occasion there ever is for her granddaughter, I think that eventually said granddaughter might not need quite that many quilts. So, I was on a mission to create something else. This project magically evolved and became a very special gift for my granddaughter.


The first piece of magic occurred when I needed just a few more dollars in my online shopping cart to receive free shipping. I selected a mini charm pack of Big Sky, a Moda collection by Annie Brady. Mini charm packs are perfect for sampling a fabric collection and I really loved both the color and design of this collection. Since I had no plan for these, and had been looking for some sort of hexie project, that is what I did with these.


The second piece of magic happened when I won fabric from Pink Door Fabrics as part of the Blogger's Quilt Festival. There was one piece that was perfect for Amelia as her first birthday party was unicorn themed. It was the double border print for Magical Parade by Sarah Jane for Michael Miller. The colors worked very nicely with the Big Sky collection.


As the stack of hexie's grew, I spent time arranging and rearranging, with no idea what they would become. Then, while shuffling them around on a visit to my mom's house, I thought, hey, I wonder if I could make a letter A with these?


That is when the idea to turn them into a big pillow occurred. I wasn't sure of the best technique to set and quilt hexies onto a quilt top, but I knew that I did not want to hand sew them together. I tried pinning them to the background fabric but could not get them to line up consistently. I tried spray basting them, but that was not strong enough to hold them. Finally, I did hand stitch them together, but only with very wide stitches. I also spray basted them to the background fabric and added a few pins around the perimeter. Then I quilted straight lines from point to point in all directions on the hexies. I'm sure there are better techniques for this but it got the job done.


Once the hexies were in place, it was time for some quilting fun on the rest of the project. There is small stippling around each of the parade characters which makes them stand out and look more dimensional. The characters on this fabric ended up being Amelia's favorite part of the pillow. She kept pointing to and touching all the faces. The rest of the background is quilted with whimsical swirls. The gray border on the bottom was added simply to make sure the parade did not disappear at the very bottom edge of the pillow.


The binding is a rich gold solid that picks up all the accents in both the hexies and the parade. From the crown to the lettering on the flag, to the stars on the wizard's costume, touches of gold are everywhere.


The pillow is made in an envelope style so that the form can be taken in and out easily and the cover can be washed as often as needed. While there is less quilting on the pillow back, the design is just as much fun as the pillow front.

As you would expect from any young child, she enjoyed the large gift bag this was delivered in as much or more than the pillow itself. The pillow form is 26 inches square. My hope is this pillow will see itself through many hours of book reading, movie watching, and cuddling.


Sunday, December 17, 2017

Skull Quilt - A Halloween Quilt as a Christmas Gift


Yes, I know it is unusual to give someone a Halloween quilt as a Christmas gift, but I could not have done better with creating a gift fitting for its recipient. For a while now, my daughter has wanted me to make a quilt for my son-in-law. And I wanted to make him one, but our tastes are very different so it took me a while to channel his desires into a quilt.


I like all the colors, bright and bold. He likes neutrals. His favorite holiday is Halloween. My least favorite holiday is Halloween. Somewhere along the way, I decided to investigate a skull quilt. I think I was inspired by some of the brightly colored skulls from Day of the Dead celebrations.


The resulting quilt is a very close replica of this picture I saw on Pinterest. The picture did not link back to a specific source so I am not able to give full and proper credit.

Most of my quilts are created from stash, but this one required a more limited, neutral set of fabrics, and fortunately a little bit of online shopping landed just the right combination for this quilt.


It was fun to piece and fun to quilt. Using the inspiration photo as a guide, it became much like assembling a mosaic.


The eyes, nose, and mouth are heavily quilting in hopes they would recede into the bones of the skull. The spirally eyes were especially fun to quilt.


The pebble quilting that surrounds the skull is one of my favorite ways to quilt.


Finally, I wanted to personalize the quilt so instead of a traditional label, I quilted Zack's name and the year right into the border surrounding the skull. We got together with Zack and family a couple of weeks before Christmas as they will be travelling to see his family on Christmas day.


The backing is made from the leftover fabric.


This guy makes a big quilt at 82 x 88 inches. I loved being pushed out of my comfort zone to create this quilt for my favorite (and only, ha!) son-in-law.

Wednesday, September 20, 2017

Raven's Camera Quilt - A Blogger's Quilt Festival Entry


It's the Blogger's Quilt Festival week! Each quilter can enter two quilts in the festival and it's so fun browsing through all the entries. There are so many talented quilters. I wanted to be a part of all the excitement.


My favorite finish so far this year is Raven's Camera Quilt. Raven is a professional photographer and my niece. Her mom commissioned this quilt to give her for her birthday.


You can see more pictures and read all about the creation of this quilt here.

Please visit the Blogger's Quilt Festival and be inspired by all the wonderful entries. Amy does a fantastic job every year hosting this event.

Monday, August 28, 2017

Stack and Slash Poinsettias - A Finished Quilt


This little project was a filler between some of the bigger quilts I have been working on. The wedges for the blocks were given to me by my mom, who decided after trying one that these were going to be way too much work to make in a way that would result in a remotely flat block. She was right; accuracy is a must here, and you will see shortly that some of mine are not as flat as they ought to be.


This was a fun little quilt to make. There were twelve blocks in the kit, but I loved featuring the center poinsettia and the three that were left out were kind of boring. I did save one of them to possibly turn into a pot holder.


The fun part was free motion quilting the blocks. I used a light backing fabric on purpose so that the quilting would stand out. Not because the quilting would be great but because it would help me see what it really looks like and show me areas where I needed more practice. The quilt is small, finishing at 27 inches square. That made it super easy to maneuver under the sewing machine. It looks like I took a black ink pin and scribbled all over the backing.

This was my favorite. The secondary design was a nice surprise.

Quilting black thread on black fabric is not easy. Thankfully, none of the awkward scribbling effect is noticeable on the front. I think the loops in the corners look like some sort of electrical connection.

This quilt was washed prior to this photo shoot, so it's a bit crinkly.

Here's a close up of my favorite block. All that circle quilting pushed the extra bulk toward the center. It really puffs up.

You can see it much better at an angle. I should trapunto it so it looks more intentional. There are a couple of other blocks with a little poof but this one was the most extreme.

I had this pretty binding fabric in my stash. It finished off the quilt nicely. The only regret I have is that the cut wedges did not come with a larger piece of the fabric. I would love to know the full design on the original fabric.

I'll be taking this quilt right back to where it came. My mom's. I was thinking it would look nice laying over the back of her sofa. I'm sure she will be able to find a home for it when the holiday season rolls around.

Sunday, July 30, 2017

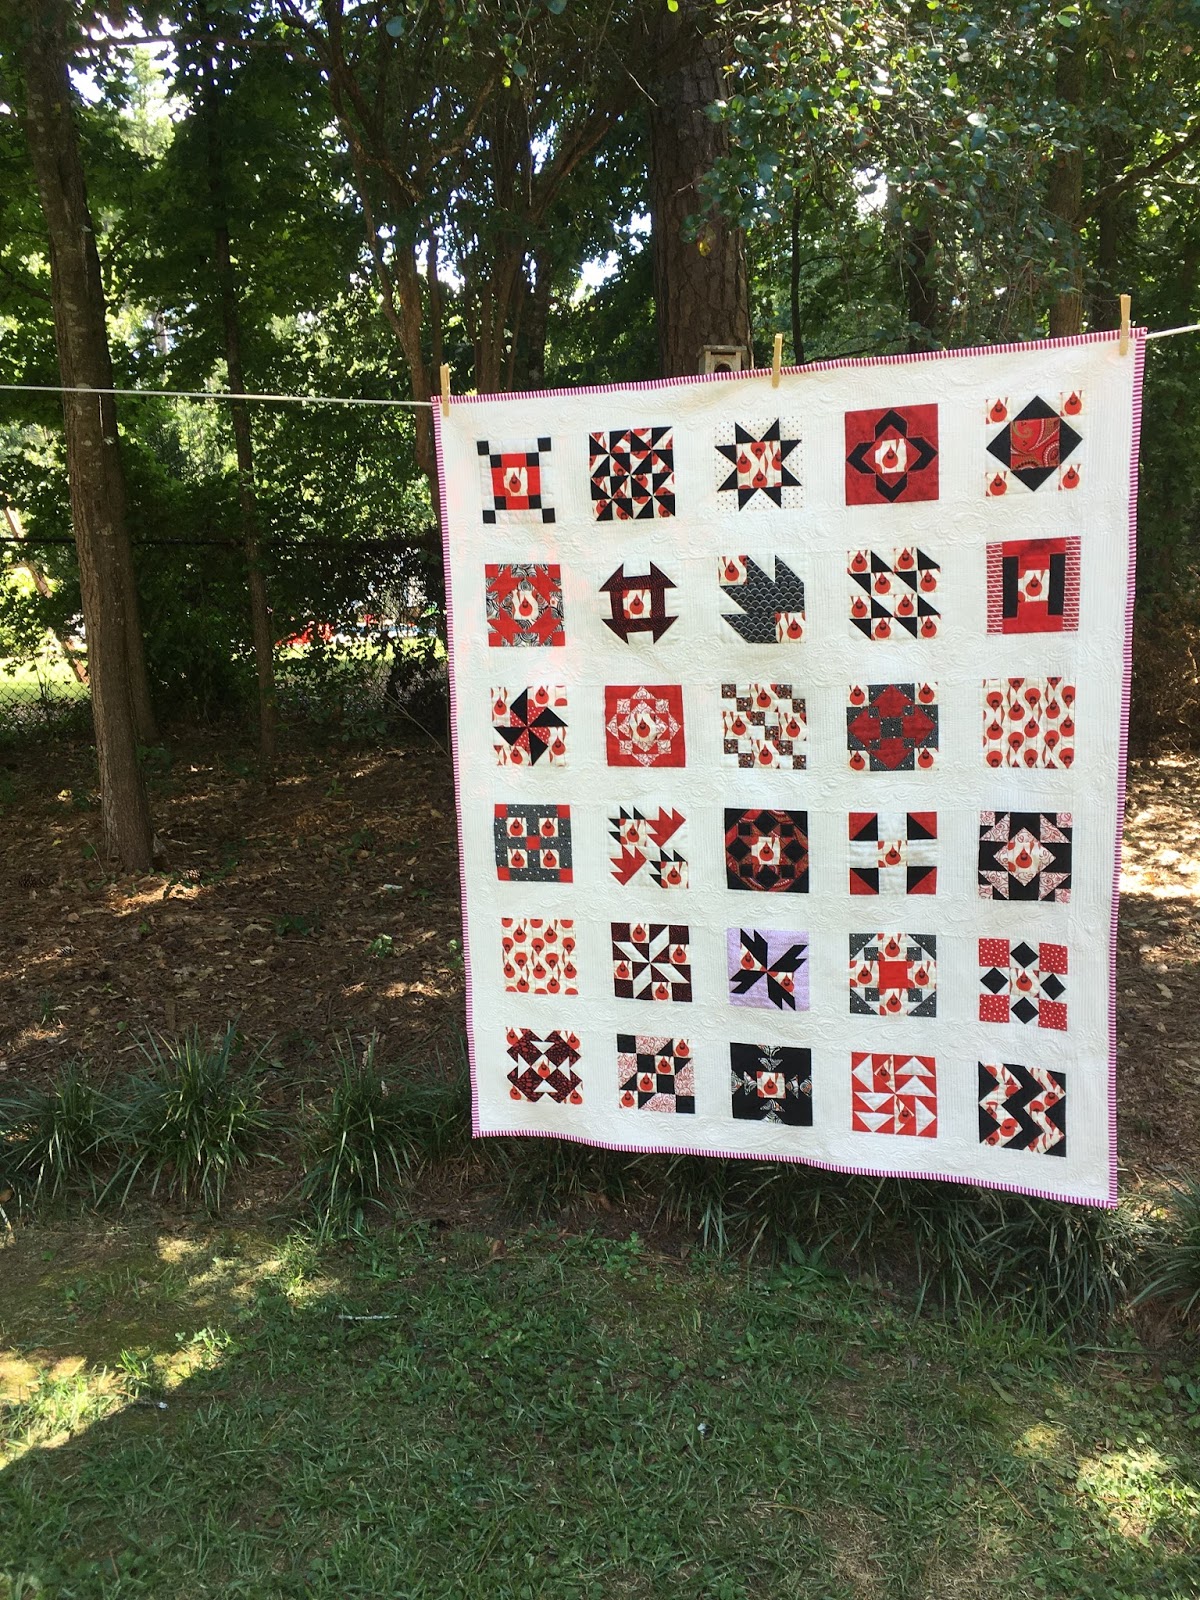
Cardinal In The Snow - A Finished Sampler Quilt


What an exciting finish. I had expected this quilt to take me well into August, but I got into a quilting groove this morning, and look what happened!


It all started with a one yard purchase of Charley Harper cardinal print. It sat and sat in my sewing room. I wanted to use it but I could never settle on a project, until the Moda Sampler Shuffle began. I knew right away that fussy cutting those cute birds to work in the sampler blocks would be lots of fun.


When I started this project, I was blogging a lot more, and the pace was just right to provide a regular blog feature, a few finished blocks at a time. All of the other fabric in the blocks is from stash, which was a good way to use up some of my red, white, and black fabrics.


The only downfall in using older stash is that one of the reds is a bleeder. I'm not sure if you can tell in the picture, but the white with red print is starting to look a little pink because the red solid is making its way onto that fabric. I used a blue water soluble pen to mark the curves for the stems of my paisley feathers. When I sprayed the pen marks off, that is when I first knew I had a problem.

I thought about washing it with multiple color catchers and hoping for the best, but instead, I have decided not to wash it at all and hope for the best over time. It is intended as a wall hanging so washing isn't really necessary. That particular fabric is in five or six of the blocks. This is the first time I have ever had a problem with any fabric bleeding like this, so I consider myself fortunate on that count.


Look how the white thread shines on the red backing.


Here it is a little closer. There are plenty of imperfections but overall, I am happy with the texture of the quilting. The entire quilt was done in free motion and some of the straight lines are a bit shaky. It was great practice.
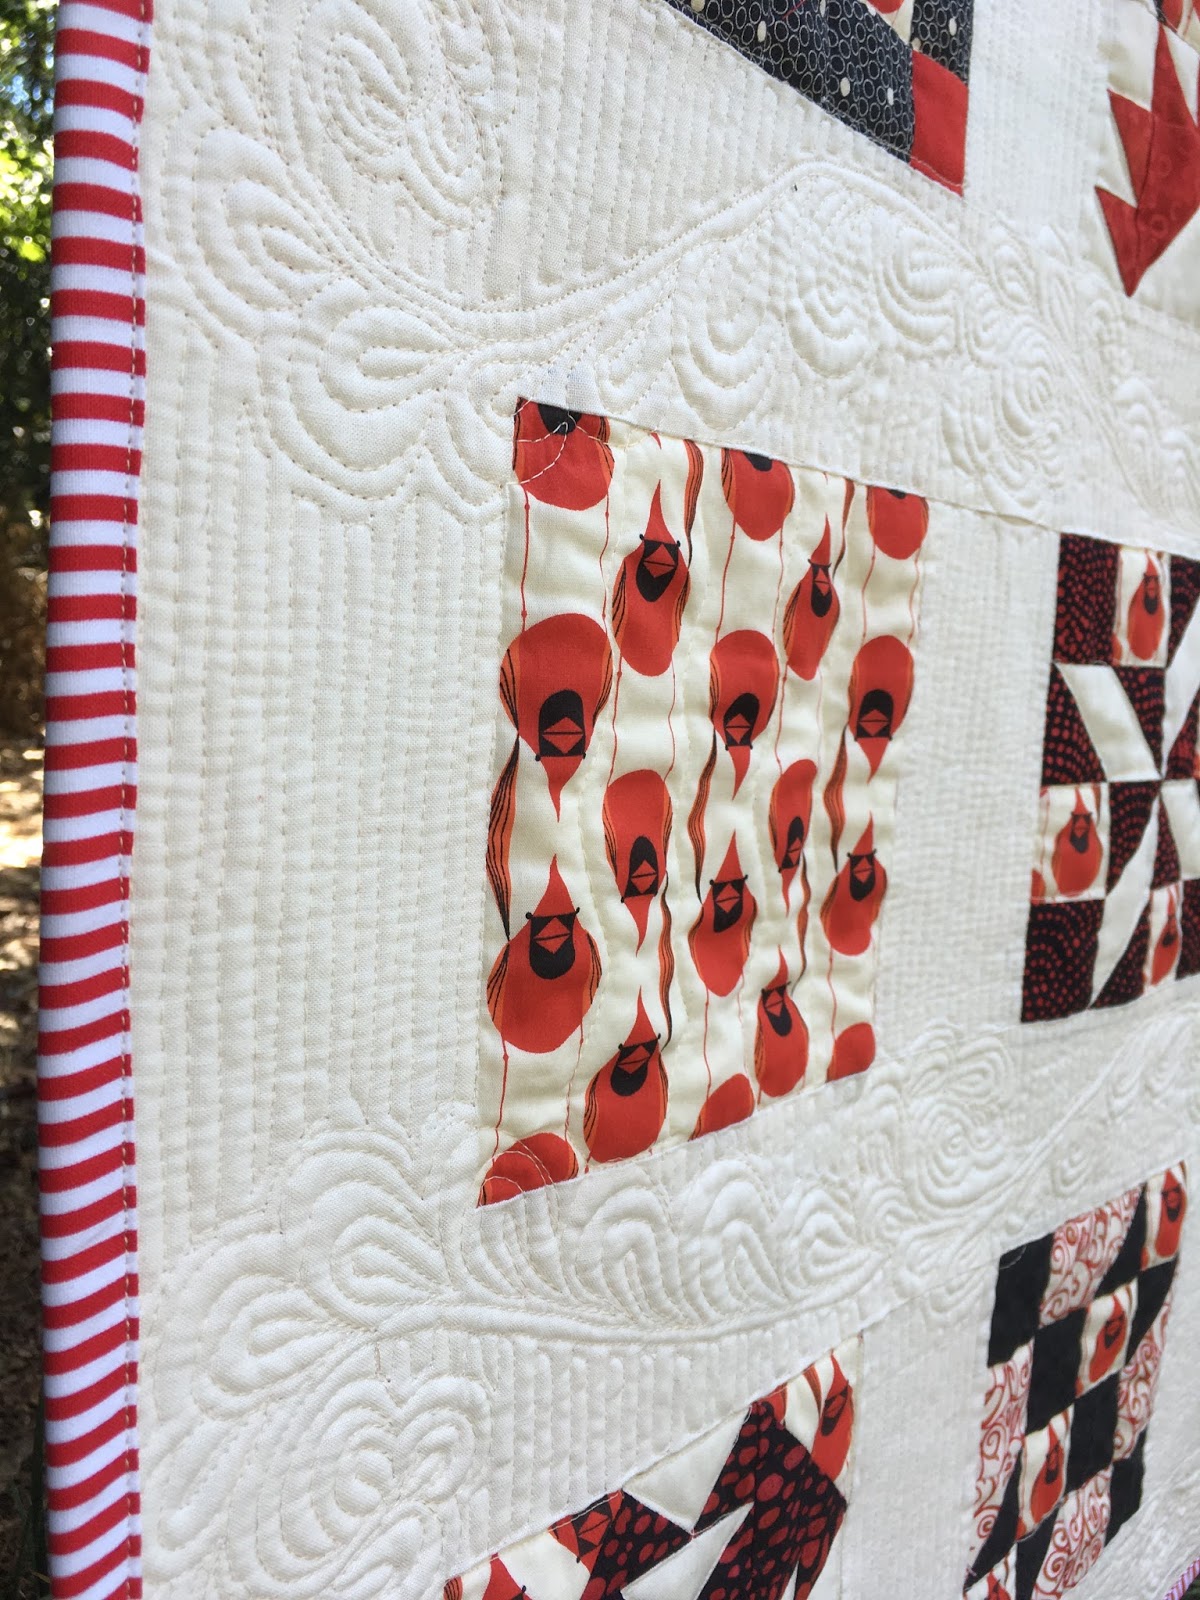
I was determined to use a feather pattern of some kind in the sashing. Most of the patterns I saw were a little too formal until I saw this paisley feather design by Angela Walters. She has some great You Tube videos and I must have watched this one ten times before giving it a try. Originally, the feathers were going to go in the vertical space, too, but once the horizontal rows were quilted, it was going to be too busy to do more of those. The evenly spaced vertical lines provide a good contrast to the feathers. Each of the pieced blocks has minimal quilting.


The shadows fell just right while the quilting was in progress. The design stands out nicely in this picture.


I have been wanting to use a striped binding forever. This quilt will be on display during the winter/holiday season and I like the hint of candy cane it adds to the quilt.


The backyard clothes line has become my go to place for quilt photographs these days. My helpers only get called into action for the bigger projects. This quilt finishes at 48 inches x 57 inches.


I live in the south, where it rarely snows, and I've always loved pictures of cardinals in the snow. Now I have my own version, with or without real snow.

Saturday, July 8, 2017

Kite Tails - Believe Circle Finished Quilt


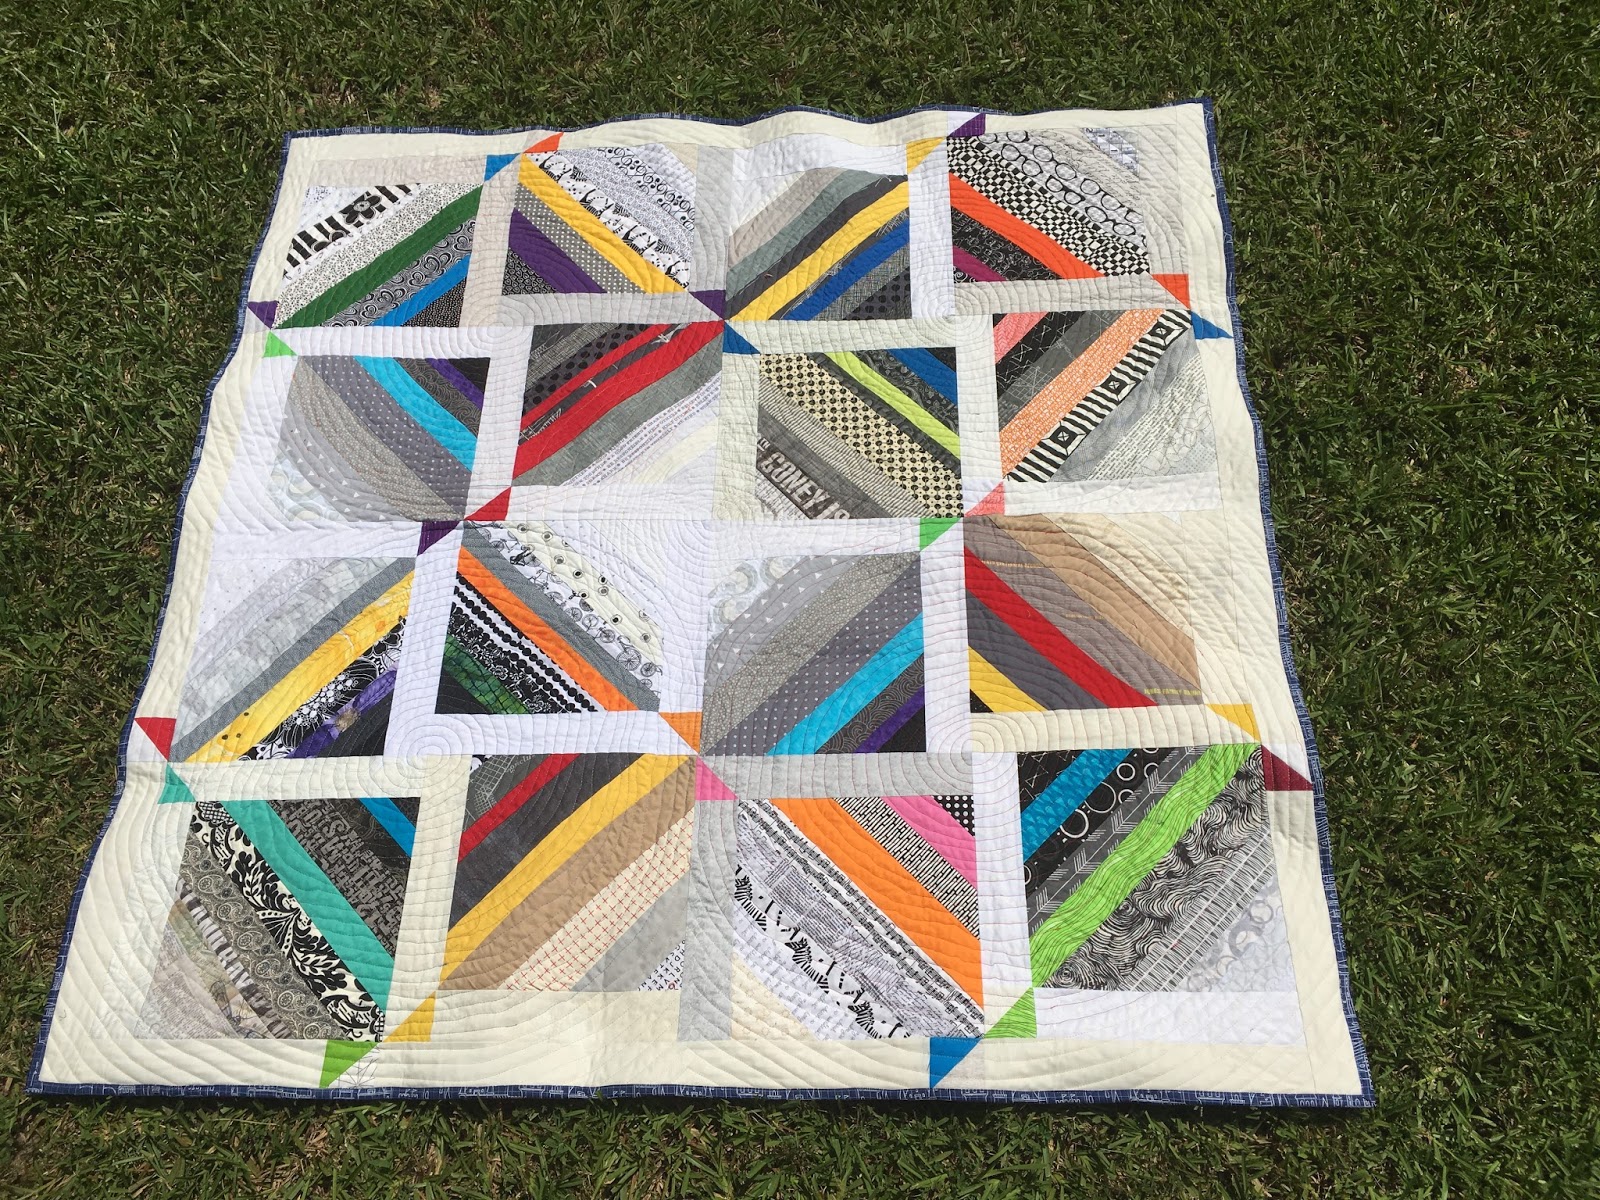
For our May Believe Circle quilt, members sent in strippy neutral blocks with a couple of bright colors thrown in. They have a border on two sides and a half square triangle on the corner. Those triangles remind me of either confetti or kite tails. I love how four blocks form a larger on point block. As with so many of the quilts I make these days, the design is inspired by a Pinterest photo.


Each member of the circle sent two blocks so there were enough to have four blocks as the center of the quilt back. The boring neutral that surrounds the blocks comes from fabric I was given in a box labeled "ugly fabric". And while it isn't the most beautiful, I used lots of bright colored thread in the quilting to cheer it up a bit.


This isn't my best quilting. I have always used a walking foot when quilting a large spiral or circle pattern, and that always became tedious near the end, guiding the quilt round and round and round. I decided to give free motion circles a try. They were great near the center, but as the circles became larger, the control became more difficult. There were lots of jumps when I would stop and start as you can see in the orange. You can also see on the right where I marked "ish" guidelines for my circles.


The free motion circles go to the edge of each block. Then, I set up my walking foot and echo quilted around all the circles until I reached the edge of the quilt. Those stitches are so much better.


The label is fused to the back and held by quilting.


Each set of circles is quilted in a different thread color. The quilts our circle makes are designed to use stash so the design is usually quite scrappy. This time I used thread stash as well, so many bobbins that had only a little thread on them were emptied during the quilting. There is blue, green, orange, red, and gold thread. In some cases, several shades of a color was used. Now, I have plenty of empty bobbins.


The quilt finishes at about 52 inches square. The binding is a dark blue print from the backing scraps of another quilt finish.


I won't free motion such large circles again but it was a worthy experiment.


A few of the pictures were taken before I sprayed the quilt top with water to get rid of all the blue marking lines. They come right off with a quick spray of water.


It's time to put this quilt in the wash and ship it off to My Very Own Blanket. This is the first time this year I have been caught up with all of my deadline sewing. It feels really good.
Related Posts Plugin for WordPress, Blogger...