Showing posts with label tutorial. Show all posts

Sunday, May 5, 2019

Two tutorials - Quilts from Shirts


The original post for these quilts was just over two years ago. This set of mini-quilts was made for a family of five siblings to remember their father. I've received several questions about reproducing the design for the first and third quilts so thought I'd share that information here so that you can make one, too.

One frequent question is about how to size the finished quilt to be bigger or smaller. Both of these designs are based on an eight block by eight block grid. In other words, there are eight rows of eight blocks. To determine your finished quilt size, decide how big the finished block size will be and multiply by eight. Here are some examples:

  • 2-inch finished block = 16-inch square finished quilt top
  • 3-inch finished block = 24-inch square finished quilt top
  • 4-inch finished block = 32-inch square finished quilt top
  • 5-inch finished block = 40-inch square finished quilt top
  • 6-inch finished block = 48-inch square finished quilt top
  • 7-inch finished block = 56-inch square finished quilt top
  • 8-inch finished block = 64-inch square finished quilt top
  • 9-inch finished block = 72-inch square finished quilt top
  • 10-inch finished block = 80-inch square finished quilt top
  • 11-inch finished block = 88-inch square finished quilt top
  • 12-inch finished block = 96-inch square finished quilt top
  • 13-inch finished block = 108-inch square finished quilt top
  • 14-inch finished block = 116-inch square finished quilt top
That should cover every size from a mini-quilt up to a king sized quilt. The quilts hanging on the line are 24-inch quilts which means they have 3-inch blocks.

Here is the simple grid for both quilts. Forgive the low tech drawings. You would think that since my day job is all about technology, I would up my game but I really love the simple process of graph paper, ruler, and pencil.


Let's figure out the design breakdown for the first quilt. It is based on the traditional jewel box pattern which is made up of four-patch blocks and half square triangles.


It is a two value quilt, using dark and light fabrics. In my version, the dark is scrappy from the shirts and the light is a Bella solid (ivory maybe). If you look closer, the dark value is really both dark and medium values. I could get away with a wider range of values since my light was very light and also consistent within the quilt.


Each quadrant of this quilt is exactly the same so make one and repeat three more times. The upper left quadrant is drawn out for you. Each quadrant consists of eight half-square triangles and eight four-patch blocks. For three-inch finished blocks, each square in the four-patch blocks should be cut to two-inch squares. Here's the math for that:

    Finished block size divided by 2, then add half an inch = cut size of squares for the four-patch unit.

And a couple of examples:

    Finished block size = 4 inches
    Divided by 2 (or take half if that's easier for you to think about) = 2 inches
    Add half an inch = 2 1/2" cut squares for the four-patch block

    Finished block size = 7 inches
    Divided by 2 = 3 1/2 inches
    Add half an inch = 4 inch cut squares for the four-patch block

There are many great tutorials out there for half-square triangles, so go to your favorite or check out this one for help making those.

That's all there is to it. 


Now let's take a look at the third quilt hanging on the line. In one way this quilt is easier and in another it is more complicated.


It's easier because it has simpler units. It is solid squares and half square triangles. It's more complicated because it uses three values: light, medium, and dark. The layout is a little trickier too only because it's easy to turn one of those triangle units the wrong way while sewing the blocks together. 

Here's the grid for this one:


For the grid, L means light value, M means medium value, and D means dark value. Because I was working with shirts and had a limited colors/values available, this design was a bit tricky, but it worked out just fine. I had to be careful of placement for those fabrics that could pass for more than one value. The stronger the value, the stronger the design stands out for this quilt.

It's a busy drawing so here is the break down of the blocks you need:

    Light squares = 20
    Medium squares = 12
    Half square triangle blocks with half light, half dark = 20
    Half square triangle blocks with half medium, half dark = 12

We covered how the block size determines the quilt size way up at the beginning of this post and I've also shared a link to my tutorial for making half square triangles. Here it is again just in case you skipped over the instructions for the first design and came straight to this one.

With these details, you should be ready to jump in and make your own version of this quilt, too.

I love how simple squares and triangles can be put together to make thousands of designs. Have fun creating your own quilts and please let me know if you have any additional questions or need more details for either of these quilts.


Friday, October 30, 2015

Holiday Initial Mug Rug Tutorial


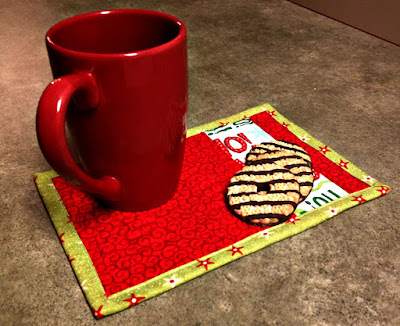
It's time to start thinking about quick holiday gifts. This initial mug rug is fast and very easy to make. It isn't apparent from this picture but it is an "initial" mug rug because there is an initial quilted into the large square.


The parts you need to make the front are one 6 1/2 inch square, one 2 1/2 inch x 6 1/2 inch rectangle, and one 1 1/2 inch x 6 1/2 inch rectangle.


Before sewing them together, you need to draw your initial on the 6 1/2 inch square. To find a letter I wanted to use, I opened up my word processing software and started looking through the available fonts. It is important to use something fairly simple so that the letter does not get lost in the quilting.


The font I chose is "Georgia". It is a common serif font and usually available on most word processors. I suppose I should have printed the page and taped it to a window to be able to see it. Since I was making this after dark, I did the next best thing and traced it straight off the computer screen.


Yes, I used tape and taped it directly to the screen. A blue, water soluble marker did the trick for the tracing.


Next, stitch the three pieces together to form the top using a 1/4 inch seam. Cut batting and backing at least 7 inches by 10 inches. Layer the top with batting and backing and quilt in any way you desire. To make the letter stand out, use dense quilting to fill the background. I used a small meander stitch in matching thread and I also stitched directly on the lines that form the letter. In the small red rectangle on the right, I free motion stitched a back and forth horizontal(ish) line. I switched to my walking foot for the light accent fabric and stitched vertical lines about 3/8 inch apart.


Here it is from the back. There were a few tension issues, but not horrible.


If you wanted to skip the initial in this project, you could easily choose three pretty prints and do some simple all over quilting. I am hoping to make quite a few of these to use as gifts for my office mates. The initial personalizes it and makes it special just for them.


I wasn't sure if I wanted traditional binding or if I wanted to do a sew and turn method for this project. I'm glad I went with binding. I like the way it frames up the project.

There are so many variations that can be made with this project. For the light accent fabric, you could stitch together some smaller scraps to make an improv stripe. You could choose to quilt in a motif instead of an initial, like a snowflake or holly leaves. If we push past Christmas, wouldn't this be cute in Valentine's Day fabric with a heart quilted in the big square. The possibilities are endless.


Other posts that feature gift ideas:

Wednesday, October 14, 2015

How To Calculate Yardage for Quilt Borders

"How many yards should I get to add a border to my quilt?"

This is one of the most popular questions from my retail quilt shop days. Let's remove the mystery from those calculations today by talking through the options. Hang with me. This might start feeling a little like math class but I promise to help you every step of the way. At the end of this post there is a worksheet you can download and save. Just print the worksheet, answer the questions and you will be able to easily calculate your own border yardage every time.

Before we get too far, please remember that I am here for you. As you are reading, if it gets to be too many numbers or you start thinking I must be crazy (me crazy, not you crazy), stop there. I will be happy to calculate your border yardage for you. Send me an email and we will figure it out together.


There are some basic facts that you need to collect to get started:
Width (the green arrow) - How many inches is the shortest side of your quilt top?
Length (the red arrow) - How many inches is the longest side of your quilt top?
Border Width (the blue arrow) - How wide, in inches, will the border be? Add half an inch to allow for seam allowances.
To make things easier, let's go ahead and calculate the Quilt Top Width including Borders (the purple arrow). It is simply the quilt width plus the border width plus the border width. Yes, I added the border width twice on purpose.

With those four numbers, we can determine the number of yards required to complete your border. The calculations we are doing result in exact yardage. You will want to add to that to make sure there is a little bit of room for error in cutting, stitching, or calculating. I would add a minimum of a quarter yard to any final calculation.

Things are really easy if your quilt is small. So, first question:

Is the largest number from the four we have figured out above less than 40? 

If the answer is YES, then you only have two more steps to go.


Since each border can be cut from one strip of fabric, you only need four strips that are the width of your border plus seam allowances. Use the number you calculated for the border width (the blue arrow) and multiply it by 4. Hold on to your answer. You need to plug it into the last step.


Divide your answer by 36 and you are done. This is the exact yardage needed. Remember to add a little extra for wiggle room in cutting and stitching.

So, now what? What if you have a big quilt? Personal preference comes into play a little bit here. Next question:

Do you mind extra seams in the piecing of your border?

Some quilters prefer borders without extra seams, which generally means the border is cut from the length of the fabric rather than the width. If you don't want extra seams AND your border is less than ten inches wide, one calculation will do the trick:


All this calculation does is take your absolute longest measurement from the quilt length, quilt width, border width, and quilt width plus borders (which will be in the top two boxes on the bigger worksheet) and convert it from inches to yards. Easy! And if you happen to have one super wide border that is bigger than ten inches wide, just take the answer above and multiply it by 2.

Last set of calculations coming. This set is for a quilt bigger than 40 inches where you don't mind having extra seams in the border. This is going to be the most common way to calculate your border. First, calculate the sum of all your border sizes in two steps:


That is two sides of your quilt. Plug that answer in here:


That is all of the inches of border fabric you need. Now, we'll figure out how many widths of fabric that is.

Round that answer up to the next whole number. So 3.25 would be 4 and 4.8 would be 5. Always go up, not down.

Next, multiply that number by the width of your border:


Now, convert inches to yards and you are done!


Here's what the whole worksheet looks like. Just click on it to download your own copy.


It is a lot easier on paper I think, especially when the parts that don't apply can be skipped over.

Please, leave a comment or send a question by email if you have any additional hints and helps or if there is something that isn't quite clear for you. I am happy to help you calculate border yardage, or answer any other questions you may have.

When I first thought about writing this, I thought, oh, calculating fabric for quilt borders is easy. And it really is when you do it over and over and can run through the math quickly in your head. But when it comes time to write it down step by step, it isn't as easy as it first seems. I love it when I learn just as much as I am trying to teach.

Wednesday, October 7, 2015

Seven Methods for Making Half Square Trianges


A while back, I accumulated as many methods for creating half square triangles as I could find. They were used in a class that required LOTS of half square triangles. Each student received a nice hand out with the instructions and math for all the methods, but I had never fully tested each one. So, it was time to officially test and confirm each one to validate the instructions and accuracy. The goal for each method is to yield 3" finished half square triangles, both for consistency from method to method, and so all of the half square triangles created could be used together in a project.

 The seven methods are:
  • One at a time
  • Two at a time
  • Four at a time
  • Eight at a time
  • Eighteen at a time
  • A strip method
  • Another strip method

As a disclaimer, I am fairly conservative when I sew, which means I am more likely to size things up a little more than necessary just to give myself enough margin of error, and also so I can accurately square up each unit once it is created.

Method 1 - One at a time

Use this method when you need only one half square triangle, or your desire is for every half square triangle to be unique.

Cut triangles from two fabrics. I cut a square from each fabric and then cut it on the diagonal to create my triangles. If you cut squares first, they should be one inch bigger than the finished size of the half square triangle. So, for three inch finished units, cut 4" squares.


Place the triangles right sides together and stitch a quarter inch seam on the long diagonal side. Be careful not to distort your pieces. The diagonal cut leaves a bias edge that is more fragile than cuts made square with the grain of the fabric. Press toward the dark fabric.


Once the unit is stitched and pressed, square it up. Use a ruler with a 45 degree diagonal line. Make sure this line is on the seam line. Then check to make sure that the unit is bigger than 3 1/2 inches. If it is not, your seam allowance needs to be smaller, so you will need to start again. Keep going if your unit is 3 1/2 inches or bigger. Hold the ruler in place, then trim two of the sides. Rotate your cutting mat and line up the ruler on the 3 1/2 inch line around the square and the diagonal line on the seam. Trim the other two sides and your half square triangle will be ready to use.


Calculation review: Finished half square triangle size + 1 = Cut square size.
3 + 1 = 4 inches

Method 2 - Two at a time

This is the most common method for making half square triangles.

Cut two squares. The official calculation for determining your square size is to add 7/8 inch to the finished size of your half square triangle to determine the square size to cut. I always add 1 inch just to be safe. For our 3 inch finished units, cut two 4 inch squares.


Lay the light square on top of the dark square with right sides together. Use a ruler to draw a diagonal line on the wrong side of the light fabric. Two products I love when making half square triangles: Creative Grids rulers and PaperMate Sharpwriter #2 lead pencils. Both the lead and erasers are great on these pencils. Neither company paid me to endorse their products. I am just sharing some of my favorite things with you.


Here is how the line should look.


After drawing a diagonal line, stitch a quarter inch seam along each side of the line. They are hard to see, but there are stitching lines there.


Cut on the drawn line.


Press each unit open, pressing toward the dark fabric, square up your units, and you will have two half square triangles ready to use.


Calculation review:
Finished half square triangle size + 1 = Cut square size.
3 + 1 = 4 inches


Method 3 - Four at a time

This is the only method that required more than one try. The first test yielded units that were too small. The instructions said to use the finished size for calculating. For the second try, I used unfinished size and the results were much better. The calculations for this one are trickier, using both decimals AND division. Just use a calculator and go with it. This time use the unfinished half square triangle size and divide it by 0.64. Round that up to the next whole number. For finished 3 inch half square triangles, cut 6 inch squares.


Place the squares right sides together and stitch a quarter inch seam around all of the outer edges. It is really hard to see the stitching lines but I promise they are there.


Cut across the diagonal in both directions.


Press each seam to the dark fabric, square them up, and four half square triangles are ready to use.


Calculation review:
Unfinished half square triangle size / 0.64, then round up to the next whole number.
3.5 / 0.64 = 5.46875, round up to 6 inches.

Method 4 - Eight at a time

Again, start with two squares. To determine the square size, add 7/8 inch to the finished half square triangle size and multiply the answer by 2. Round up to the next whole number. For finished 3 inch half square triangles, cut 8 inch squares.


Place the squares right sides together. Draw diagonal lines in both direction on the wrong side of the light square.


Stitch on either side of the diagonal lines. This is much easier to see from the dark side.


Cut the square in half horizontally and vertically as well as on each of the drawn lines. Since these are eight inch squares, use your ruler to measure four inches to determine your cutting lines.


This is the result once all the lines have been cut.


Press each seam toward the dark fabric, square it up, and eight half square triangle units will be ready to use.


Calculation review:
(Finished half square triangle size + 7/8 inch) x 2, then round up.
(3 + 7/8) x 2 = 7.75. Round up to 8 inches for your cut square size.

Method 5 - Eighteen at a time.

This is my favorite method. Many blocks that are made completely of half square triangles use a four by four setting, which means you need 16 half square triangles to make the block. I can see using this method with a Layer Cake (collection of fabric sold in packs of 10 inch squares) and making a cool sampler of half square triangle blocks.

This is the last method that will start with two squares. To determine the size to cut your squares, multiply the finished half square triangle size by 3.6, then round up to the nearest number divisible by 3. We will use 12 inch squares.


Place the squares right sides together. Draw two horizontal and two vertical lines on the wrong side of the light square. Since this is a 12 inch square, the lines will be at the 4 inch and 8 inch marks. This is why the block size needed to be divisible by three. Once these lines are drawn, it will look like a tic tac toe board. Now, draw diagonal lines in one direction only. There will be four diagonal lines.


Stitch a quarter inch on either side of the diagonal lines only. Here is how the stitching will look.


Cut on all of the drawn lines...horizontal, vertical, and diagonal.


Press each seam toward the dark fabric, square up each block, and 18 half square triangles will be ready to use.


That is a lot of half square triangles. I find this method very fast when you need lots of half square triangles.

Calculation review:
Finished half square triangle size x 3.6, then round up to the nearest whole number divisible by three.
3 x 3.6 = 10.8, round up to 12 inches for the beginning square size

Method 6 - A strip method

This is my least favorite method. It wastes too much fabric. There is no specific calculation for this one, so I used the finished half square triangle size for the width of each strip. Cut two strips, one from the light and one from the dark fabric.


Sew them right sides together along one of the long sides using a quarter inch seam. Press open, with the seam toward the dark fabric. Use a ruler to cut the squares, with the point of the squares on the seam line.


Each square needs to be 3 1/2 inches.


The good news about this method is that the blocks are perfectly cut. No extra squaring up to do.


Calculation review:
No special calculation required. Use strips the same width as the finished half square triangles.

Method 7 - Another strip method

Again, for this method, the strips are cut the width of the finished half square triangles, in this case, 3 inch strips.


Place the strips right sides together and stitch a quarter inch seam on BOTH long sides.


This method also requires a special ruler, the Quilt in a Day 6 1/2 inch triangle square up ruler. I like this method, and I really like this ruler. Place the line with the measurement of your unfinished half square triangle on the stitching line. Trim around both sides of the ruler.


Rotate the ruler to line up with the seam line and cut edge and cut again. Press each unit open with the seam allowance going toward the dark fabric. This is another method that comes out perfect. No need for any additional squaring up. This method could come in handing when working with a jelly roll (fabric collection cut into 2 1/2 inch strips).


There are other methods available, such as triangles on a roll, that are not included here. Which one is your favorite? Are there other methods you would like to share?

This adventure yielded 38 half square triangles. I picked a couple of my favorite layouts to see how they would look.

While I was arranging these I thought about a quilt that featured each and every layout on the sample page in just two colors. Then I did a little bit of math. There are 72 blocks on the page. Each block has 16 half square triangles. That is 1,152 half square triangles. That is a lot of triangles.

Other posts about triangles:
Just Sewing - Potholders
Hot Pink Holiday Quilt
Scrappy Holiday Tree Quilt

Related Posts Plugin for WordPress, Blogger...