Showing posts with label raw edge applique. Show all posts

Monday, December 12, 2016

Modern Pheasant Pillow


Back in October I visited my daughter and her family for a few days. While I was there I noticed a pheasant themed calendar on the wall. I asked about it and learned that my son-in-law is a fan of pheasants. I had been hoping for some gift giving inspiration while I was there, so that was exactly the kind of thing I needed to know.


When I went looking for pheasant quilty things, I primarly found panels and hunting motifs. That is not what I wanted. I wanted a modern pheasant. There was one picture that worked nicely. I blew it up and traced all the parts.


This is not my usual kind of project but I enjoyed searching for the right colors and fabrics.


I was really nervous about fusing all these tiny parts so I laid him out carefully on top of the traced image to make sure I was happy with the shapes and placement. I also realized that I did not have a suitable background fabric. A quick online fabric order took care of that.

I ordered two different colors of Grunge fabric, a lighter and a darker. I settled on the darker fabric. If this pillow ends up on their sofa, it is a dark gray, and this choice should work better with their other decor.

I matched thread as best I could to each section of the pheasant and free motion stitched around all the parts to make sure they would stay securely on the pillow.


Then it was time for quilting. I used a layer of batting and a thin white batiste on the back. I wanted the pheasant to look like he is standing on the ground so I chose a horizon line and stitched horizontal lines for the ground. A large meander (which always makes me think of clouds) is quilted above the horizon line.


The backing is envelope style with an extra fabric added for interest. I like quilting the back of pillows, too, to give them more body. I layered all the pieces together and then bound it like a regular quilt. It was a little bit challenging to get through the thickness where the backing top and bottom overlap, but it worked out just fine.

I don't make enough pillows to be confident with the pillow form size and the pillow. I don't like them overstuffed but I don't want them too floppy either. The pillow itself is 18 inches when laid flat. I used a 16 inch pillow form to fill it. I think it works. Oh, how I have wanted to share progress with this project on Instagram, but they frequently look at Instagram, so it will have to stay right here in blog land for now.

Monday, February 8, 2016

Quilts Inspired By Art: Goodbloom Week Two


This is our second week working with this art print by Goodbloom. Check out last week's post for an introduction to this month's project. I decided to go with a close replica for my first project. That meant I would be studying the piece closely so that other inspiration could hit while focusing on the details of the print. And other inspiration definitely hit. I'll show you the second project in progress after we talk about this one.


For the red, green, and yellow, I used the same fusible applique technique we learned last month. After printing the art in a 4x6 format, the shapes were easy to trace.


The next step is to press the fusible to the wrong side of the fabric.


I did a test run of the applique pieces. It looked a bit plain to me. At this point I decided to do the quilting before the applique.


I needed to give myself some quilting boundaries and this lid was the perfect size. I traced around it for each flower.


It took a bit to get into the rhythm of the design but once I got going it went quickly.


Now that all the black quilting is complete, it's time to add the applique pieces.


Since this is a piece that is not likely to be washed, I could have fused the pieces and called it finished, but I decided to go ahead and quilt them to be sure they would stay in place. Some neutral quilting in the background and some binding finished it off.


Here is a closer picture of the quilting. Wouldn't this be pretty with black seed beads instead of the free motion dots?


Another up close shot.


The finished piece is 6 inches by 8 inches or so. I like the center. I'm on the fence with my binding choice and I need more practice binding small projects. There are a couple of wavy spots but overall I am happy with it.

I was ready to dive right in to the second project once this one was finished.


Those black and white fabrics kept catching my eye. I was determined to include them. This next project is a little more traditional. I started by cutting 2 1/2 inch squares.


At first, I was attempting a more random design, but ended up moving to this very traditional trip around the world look. There was no red in the beginning either, but it definitely needed it. There are several different beige prints to keep it from being too boring and also because I did not have enough yardage of a single fabric. I thought the black and white stripes distracted from the overall quilt.


I like it much better with the more dominant black fabrics. No more stripes. The design is 10 squares by 11 squares so without borders it will be 20 inches by 22 inches. I will decide about a border after it is stitched together.

For next week I'm hoping to have this inspiration piece finished and hopefully have one more underway to share.


I hope you are enjoying this exploration of quilts inspired by art. I can't wait to see what next week brings!

Linking up with Monday Making at Love Laugh Quilt and Design Wall Monday at Patchwork Times. Also linking up with Whoop Whoop at Confessions of a Fabric Addict and Finish It Up Friday at Crazy Mom Quilts.

Monday, January 25, 2016

Quilts Inspired By Art: Hello Baby Girl Version


It's a girl! Girl quilt, that is. This is our last week working with our first art and craft inspiration piece, a greeting card made by Linda Aarus of Polka Dots and Paper.


Here is the inspiration card and if you need to catch up to how we got to where we are today, here are the posts from prior weeks:


I tried to use some different techniques on this version of the quilt so you could better see some of the options. 


A traditional machine blanket stitch is used to secure each of the letters in place for this quilt. For the quilting, there is an all over flower design that covers the entire quilt except for the area with letters.


The flowers are even quilted into the borders.  There is an inch or two of unquilted space right around the outside edge of the quilt.


The quilting was fun once I got past some thread breaking issues. Changing the type of bobbin I was using helped with that. It could have something to do with my machine needing a good cleaning, too.


The quilting shows up good from this angle.


Here they are side by side. Boy version. Inspiration card. Girl version. I think we have success. I do not have a pattern to offer for this project...yet. It is a work in progress and I will let you know as soon as it is ready. You have all you need in the posts from previous weeks to make one of your own if you decide to go ahead and get started.

Our inspiration piece for next month is an art print that I found on Pinterest and tracked down the artist through Etsy. Hope you'll join me next week for another fun month of Quilts Inspired by Art.

Linking up with Monday Making at Love Laugh Quilt and Design Wall Monday at Patchwork Times.

Monday, November 23, 2015

Kaffe Fasset Mini Quilt: A Quilt Swap


I've never participated in a quilt swap before but one of the quilt shops I keep up with, Intown Quilters in Decatur, GA, is hosting a Kaffe Fassett mini quilt challenge and swap. This is all in conjunction with Kaffe's upcoming birthday and it sounded like great fun.

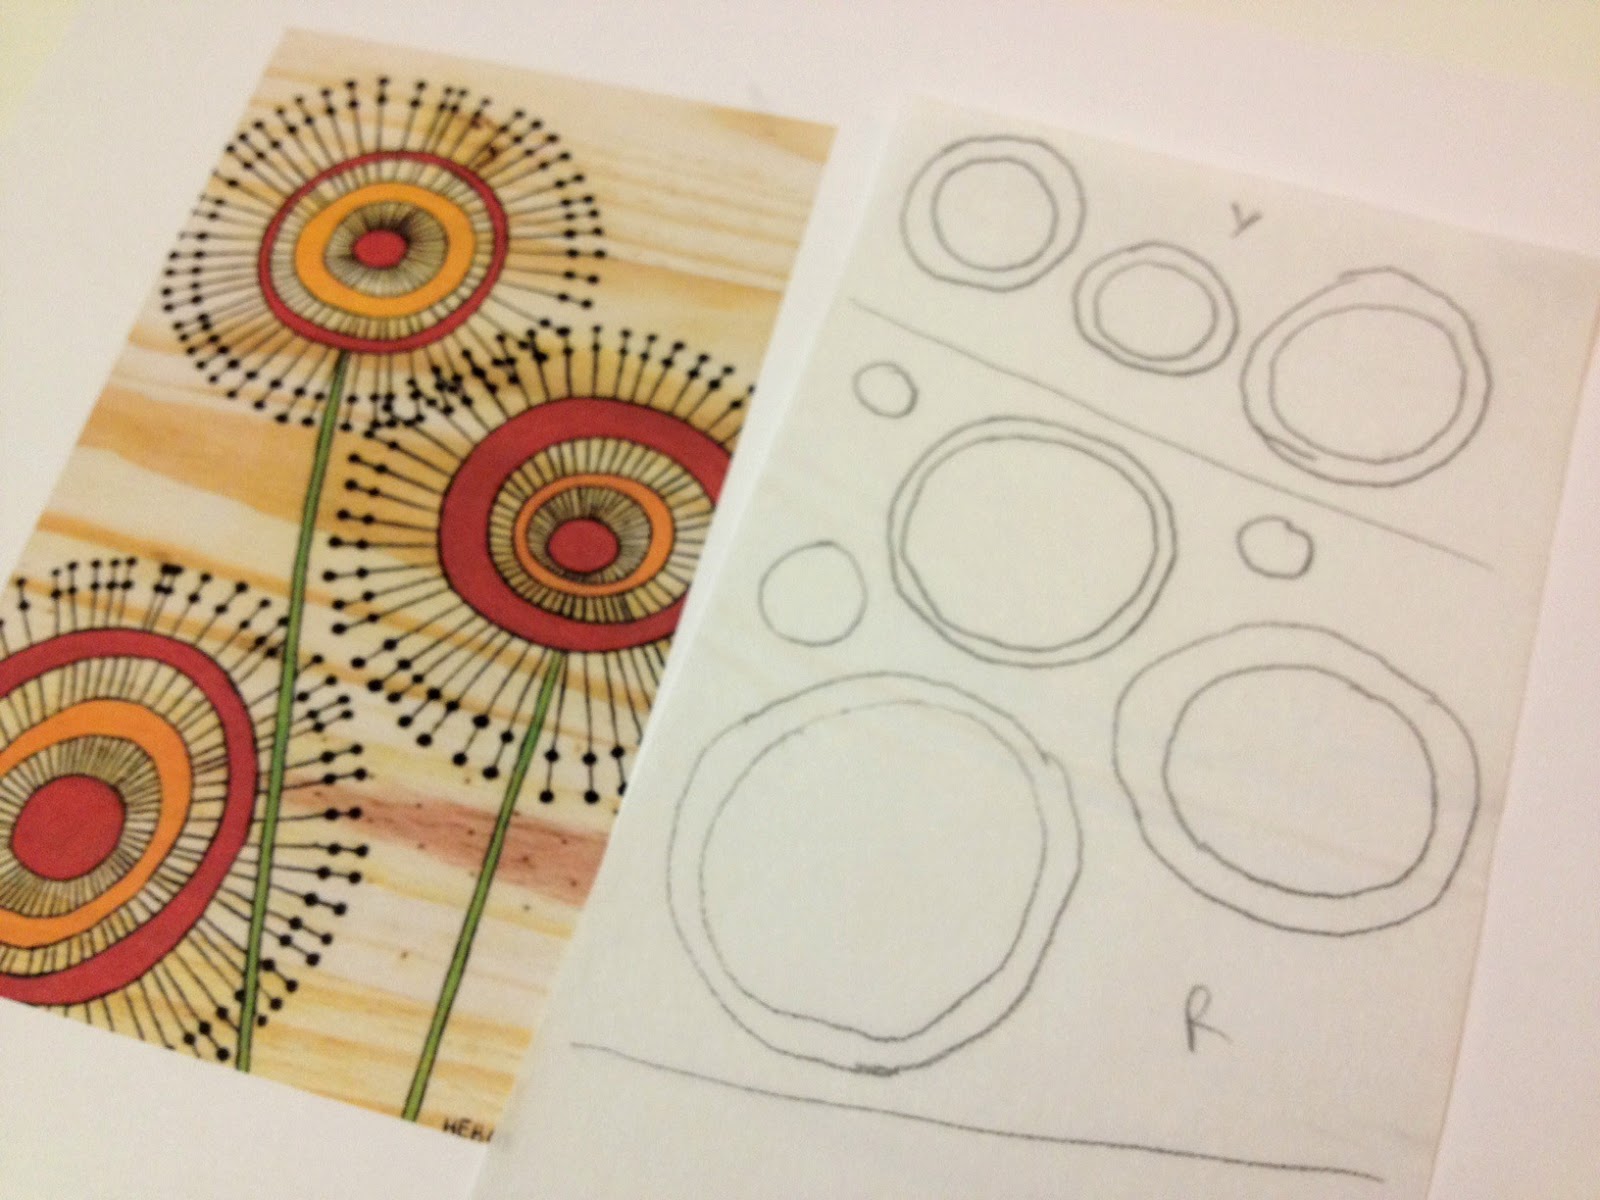
I knew right away that I wanted to make some sort of wild raw edge applique flower.


Then I was gifted with these lovely flowers and my color inspiration was found.


The final dimensions for the quilt have to be somewhere between 12 inches x 12 inches and 24 inches x 24 inches. I taped together four pieces of standard card stock and settled on something around the 18 inch mark. The flower was quickly sketched and I started wondering if it was going to look like a flower or some sort of single celled microscopic thing but moved forward anyway.


It can get a little messy in the sewing room when you are looking for just the right combination of fabric for a project.


This set ended up as the winning combination. I probably took seven or eight different pictures of what I thought was the "final" set, then would walk away for a while and come back to make one adjustment or another.


I did not have a big enough piece of anything Kaffe for a suitable background so I constructed one from a couple of different prints. That center square will be fully covered up by the flower so it really did not matter what went there.


To cut out each layer of the flower, I simply lay the cut out cardstock template on top of the fabric, pinned it down, and cut it out with scissors. It did not have to be perfect so it was a quick and easy way to get it done. This is after the first layer was complete and the template was cut down to the next layer.


After two layers.


Three layers.


Four layers.


Five layers.


Six layers. And I decided I really did not like that center. That is easy enough to fix.


Much better with just five layers. I'm glad I fussy cut that center. This is all laid out as a dry run. Nothing has been stitched at this point.


To hold each layer of fabric in place for stitching, I lightly sprayed the back of each layer with some 505 temporary adhesive spray. It worked great and avoided the stiffness that using fusible webbing can sometimes create. I worked from the outside in and stitched approximately one half inch from the edge. Again, this did not have to be perfect. I was a little nervous about those center layers since they would be stitched through so many layers of fabric (five layers of fabric, batting, and backing for the center) but it stitched very easily.


The only quilting is some free motion leaves at each corner and a few curls to add some interest. I got a little over confident and went straight to stitching with an olive thread and a completely inappropriate leaf design. So after five minutes of stitching and an hour of unstitching, I did a little bit of drawing and switched over to a lime green thread before starting again. Much better.


I used scraps from the flower layers for the binding.


I think the colors are pretty true to their inspiration. All of the pictures up to this point are before washing and drying the quilt.


Here is how it looks after washing. Just the results I was hoping for!


If I have any regrets about this project, it is that I did not try harder on the back. I just went with whatever I had that would not require piecing. It is still pretty, just not a great complement to the front.


I made this label for it, which I will print and hand stitch to the back before sending it off to the shop. It is nice they are allowing out of towners to participate. I won't receive a mini quilt back until after the first of the year. The shop will be displaying all of them throughout December. Maybe I will be able to make a special trip to see the display. The shop is about an hour and a half from home.


Here it is on the back deck, out in the bright sunshine. Fall has set in solidly here in Georgia, so the bright colors really stand out among all the brown, gold, and green of fall.

Thanks, Intown Quilters, for giving me a reason to play with my Kaffe stash. I hope the recipient of this little quilt loves it as much as I do.

Other posts about mini-quilts:
Faith, Family, and Friends
Scrappy Blue Kaffe Quilt 
Shadow Blocks Mini: A Finished Quilt 

Linking up with Design Wall Monday at Patchwork Times and Monday Making at Love Laugh Quilt. Also linking up with Design Board Monday at Bits 'n Bobs and Work In Progress Wednesday at Freshly Pieced. More link ups... Whoop Whoop at Confessions of a Fabric Addict, Finish It Up Friday at Crazy Mom Quilts, and Let's Bee Social at Sew Fresh Quilts.
Related Posts Plugin for WordPress, Blogger...