
Sunday, December 13, 2015
Friday, December 11, 2015
Star Christmas Tree Topper

Our Christmas tree has been without a real tree topper for several years. We always say we will get one but somehow never have the time or just don't see anything that we like. This year I was determined to have something on the top of the tree.

I decided to go for a simple star since we had an old topper that could serve as the base. I had all these small pieces of gold from an old fabric sample folder. Some are metallic; some are not. They looked like a good possibility for a scrappy, strip pieced star.


Here is the star that determined the template. It is a tree topper itself and is made of a dark metal. Its holder is too short and wide to actually stay in place on the top of a tree and since the star is hollow, the whole thing gets lost. A piece of PVC pipe was hot glued to the base to make it more sturdy.

It sits on the top nice enough now. It just needs to be dressed up a bit.

There were several forms of fusible interfacing used in this project, mostly because they are all stored in the same bin together. As soon as I found one that I thought would work, I'd give it a try. I know there is Steam A Seam 2 and Decor Bond in this project. They make it so easy to finish a project fast. The only sewing is the strip set that forms the star. Here the star is traced and ready to cut.

Now things are looking better. Once the gold star was cut out it was a little bit too small and needed something to make it stand out. Placing it on a black background made it look a lot better. I even fused the fabric to the PVC pipe. That was some tricky pressing. See those white interfacing edges showing? A touch of black Sharpie around the edges took care of that. It sort of looks like a magic wand laying on the table.

Each star was hot glued to the original metal star. I can't say this will be a forever tree topper but it looks better than no tree topper at all.

While I was making the star, this tree topper appeared. It would have been fine with me if this one stayed, even though it might have startled me in the middle of the night.


I like this proportion much better. This year, our little tree has lights, ornaments, AND a star on top. I love sitting by the tree in the quiet of the morning. There are lots of stories in those ornaments.
Wednesday, December 9, 2015
Machine Quilted Text: A Finished Mini Quilt
This post contains affiliate links.

I was really excited to try out adding text to my quilt by way of Creative Quilting with Your Walking Foot. Adding text to your quilt is one of the last things Jacquie teaches in her class.

I decided to test my skill with a mini quilt. Naturally, I chose the word "create". I chose a simple font (Jacquie says a simple font is important for this technique) from my word processing software and increased the font size. I printed it on card stock so that it would be easier to work with and hold up long enough for me to complete marking the letters on my quilt top.

I applied a little bit of glue stick to the back of each letter to keep it still while I was marking around it. I used a blue water soluble pen to trace around each letter.

Then I started matchstick quilting around each letter. The blue tape is a registration line so that my quilting lines don't start leaning to the left or right. I always have a straight line point of reference.

And here are the first three letters all quilted and pretty. Then I saw the word "ate" and had to stop and get a snack. Ha.

All finished!! Let's go over the size of this project. The blue background was cut 8 1/2 inches x 14 1/2 inches. The border is 4 inch strips. The top and bottom are 4 inches x 14 1/2 inches. The side strips are 4 inches x 15 1/2 inches. After quilting and squaring up, this project finishes at 21 inches x 15 inches. The letters are 2 inches tall.

Here's how it looks from the back. For the border, I simply followed the grid design on the fabric.

If I had it to do all over again, there are a few things I would do differently.
- Use bigger letters! These letters are two inches tall. That is tiny when it comes to quilting around them. I am happy with the result but it was tricky quilting inside the "e" and "a".
- I would practice starts and stops. I used the technique of setting my stitch length to zero, stitching a few stitches, then setting it to the quilting stitch length. While this worked, there are spots that look a little knotty.
- I wanted a thread that contrasted with the background, and this one does, but I think I will try a darker than background thread next time. That is more of a personal preference.

Linking up with Scraptastic Tuesday at She Can Quilt, Fabric Tuesday at Quilt Story, and Work in Progress Wednesday at Freshly Pieced. Also linking up to Whoop Whoop at Confessions of a Fabric Addict and Finish It Up Friday at Crazy Mom Quilts.
Monday, December 7, 2015
December Believe Circle Blocks

Laura is our quilter for December. These blocks were fast and fun to make.

I think I spent more time choosing the fabrics that actually stitching the blocks.

They are made from a tutorial on Pat Sloan's blog. Pat loves helping us bust through our stash. She calls it a Scrap Happy Shoo Fly Block.

Laura asked us to use bright colors along with white on black and black on white (or low volume).

I love the anticipation of waiting each month to see what blocks we will make and then after sending them in wondering what the final quilt will look like. And knowing that each quilt we make will go to a special child in need at My Very Own Blanket. So thankful for do. Good Stitches and the Believe Circle.
Linking up with Design Wall Monday at Patchwork Times and Monday Making at Love Laugh Quilt.
Sunday, December 6, 2015
Friday, December 4, 2015
Memory Quilt Finish: Two Beautiful Quilts


The large squares are cut 9 1/2 inches. The blocks with the smaller squares have a 3 1/2 inch center square of shirt fabric. A 3 1/2 inch square of background fabric is sewn to each side, then a 3 1/2 inch x 9 1/2 inch rectangle of background fabric is sewn to the top and bottom. It is a super fast and super easy block to make and I love the contrast of small and large squares.


Linking up with Whoop Whoop Friday at Confessions of a Fabric Addict and Finish It Up Friday at Crazy Mom Quilts.
Wednesday, December 2, 2015
Nerdy Star Wars Pillowcases


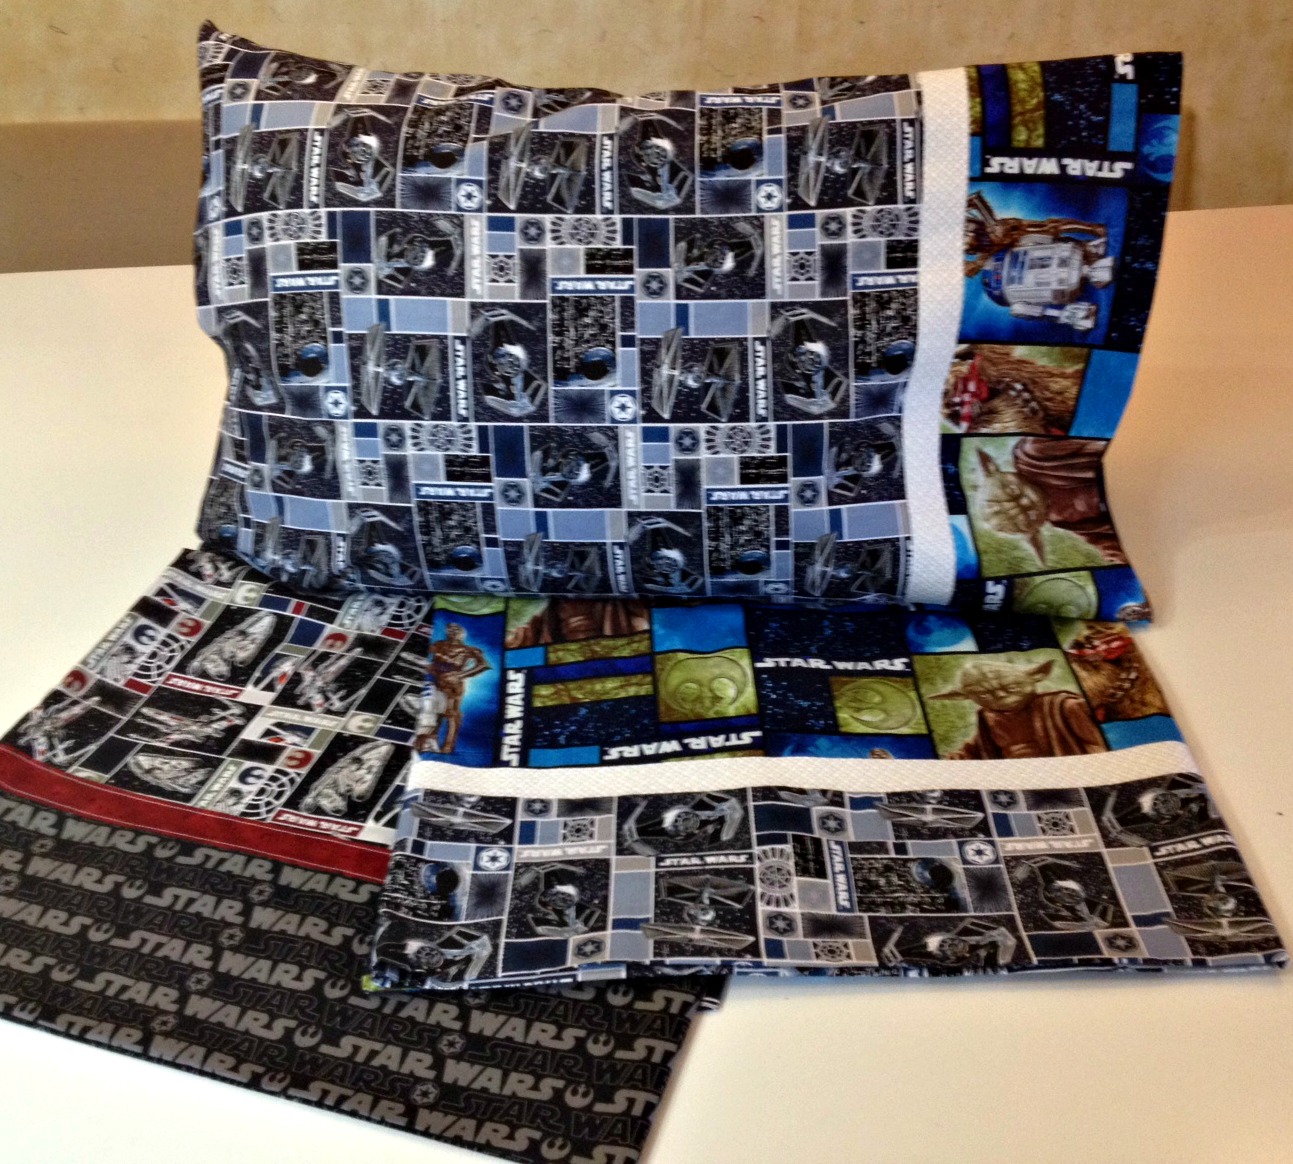
Happy gift sewing!
Linking up with Work in Progress Wednesday over at Freshly Pieced and Let's Bee Social at Sew Fresh Quilts.
Subscribe to:
Posts
(
Atom
)