Monday, September 28, 2015

Practicing on the Treadle Sewing Machine


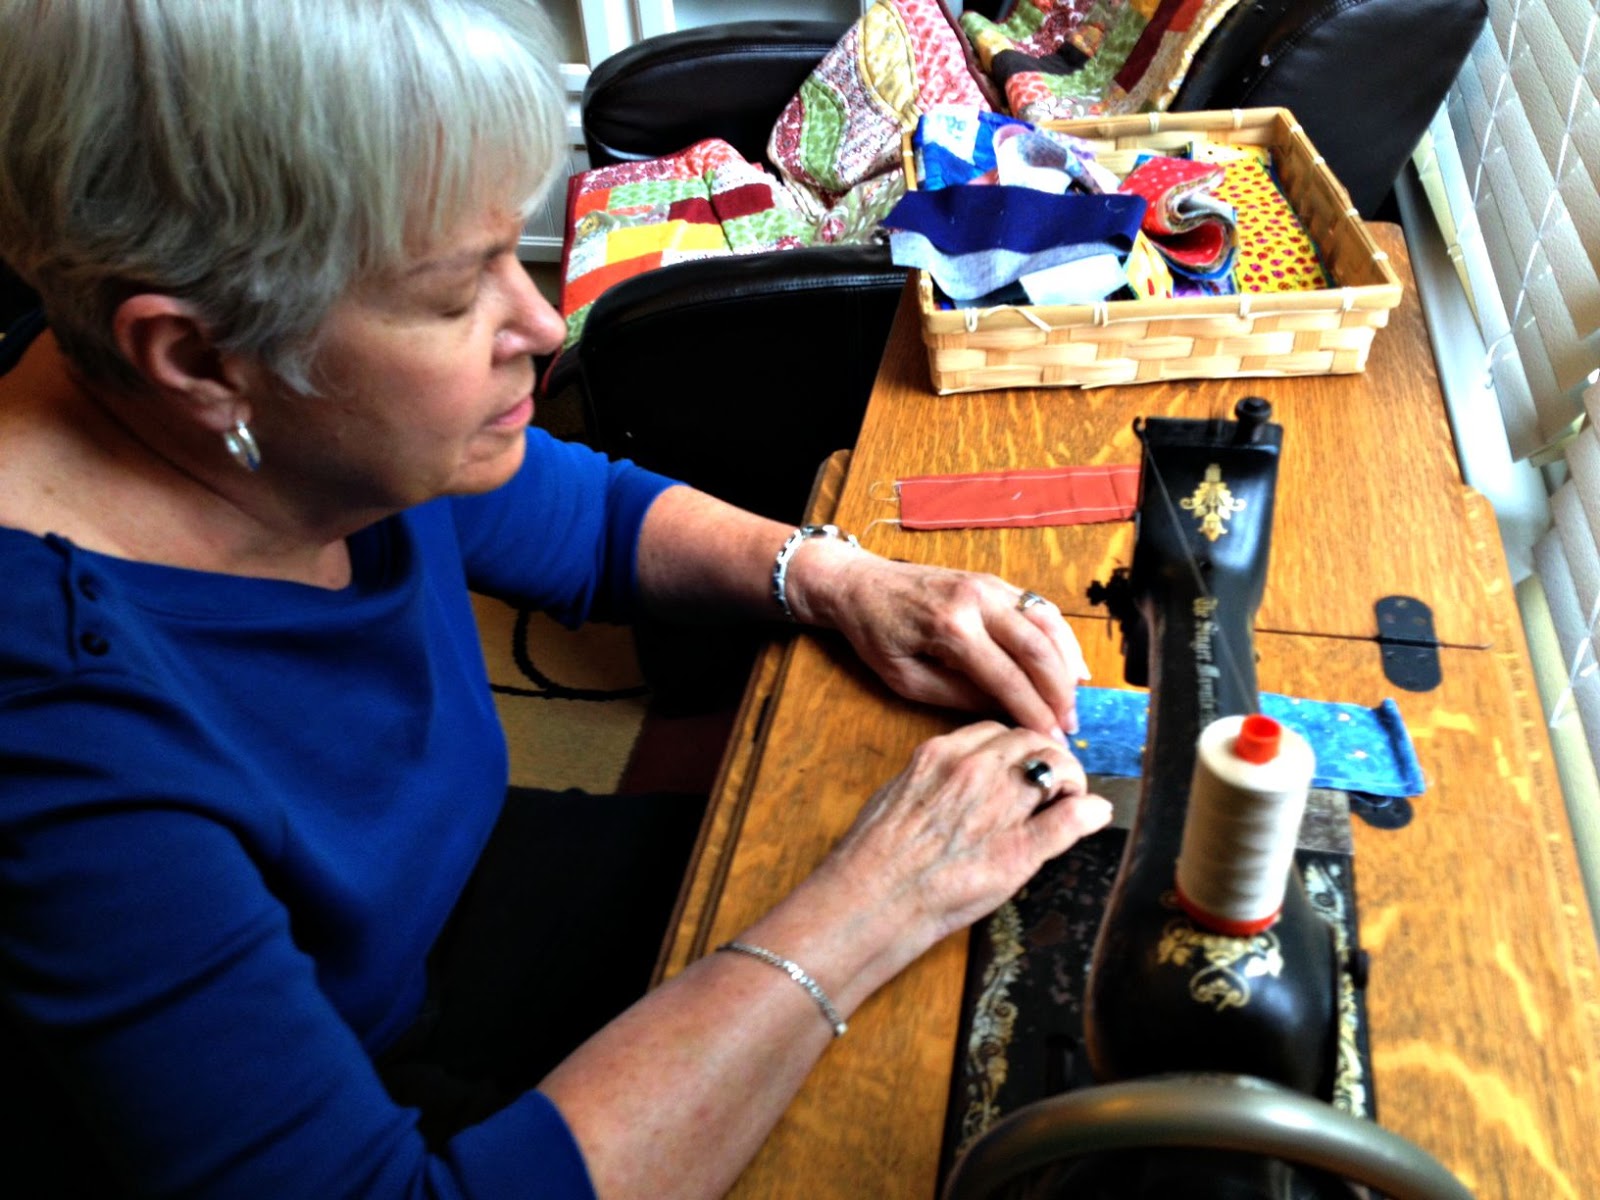
This is my grandmother's sewing machine. My mom had the cabinet restored and I am very fortunate to have it in my home. Recently, mom and I decided to use this machine to sew together a quilt top with blocks made by my great grandmother.


Before Mom and I get too far into putting together the blocks from my great grandmother, we wanted to get some practice in on the treadle machine. Fortunately, my husband knows a lot about sewing machine care so he put the belt on, oiled it up in all the right places and made sure it was ready for us. She came over on Sunday for lunch and then we got started with our sewing.


Thank goodness for YouTube. The bobbin is a long bobbin set inside a shuttle, similar to this one.


We were able to thread the bobbin and the machine, and insert the bobbin in the shuttle, but could not figure out how to put the shuttle in the machine. These videos saved the day:
Once set up was complete, the sewing worked fabulously.


After a while, the light through the window was a bit much so we turned the machine to the side. I love watching my mom sew. She remembers making clothes on this machine as a teenager. I used a piece of painters tape to mark the 1/4" seam allowance for her.

I was really impressed with the stitches. They are a bit small but very even and the tension is just right.

Every now and then, a little bit of thread would bunch up on the back, but it never impeded sewing and still holds the seam together just fine. It may be happening on stops and starts so we'll check that out next time we sew.

This is the uncropped version of mom sewing. I love the contrast of my youngest son in the background playing computer games. There have been just a few technology changes over the two generations.


The sewing machine is set up right in the spot where our Christmas tree usually stands. I told mom we had until the end of November to get that quilt top put together. I believe we will share a number of Sunday afternoon sewing sessions over the next few weeks.

Related posts:
Treadling Away
Works in Progress - Treadle Piecing and Machine Quilting 
Quilt Blocks from my Great Grandmother


Friday, September 25, 2015

Evan's Guitar - A Finished Quilt


This quilt top has been around for more than five years waiting to be finished. It is named after my oldest son, who in his teenage years decided he was going to take up guitar. Electric bass guitar to be exact. Being one to encourage all musical endeavors, he received his very own guitar and amp for Christmas. He might have played it three times in total. His rock and roll fantasy was short lived. Even though he is grown and lives away from home, that guitar still sits in his closet. We will see if either of his younger brothers get the urge.


I loved making this quilt top. It was fast and best of all, this is my favorite color palette. I had it up on the design wall for a while, thinking about how quilt it.


At first, I was determined to quilt something in each block, going for the yin yang impression given by the blocks themselves. However, the fabric in each block emphasizes that enough so I went with an overall design. There are three rows of three squares set on point. Each square is three concentric squares. The squares overlap each other creating a plaid sort of design.


I also tried changing out the thread so that every other square is dark thread and the remaining ones are light thread. This was supposed to help each square stand out on it's own but with the fabrics being so busy, it didn't really work. The texture shows far more than the different thread colors.


The inner border is quilted with free motion circles and the outer border is free motioned in a dark brown thread meandering all around the guitars.


The backing is a print by Carla Miller. I have been saving it just for this quilt. The binding is a solid dark brown.


This quilt is a keeper and will be perfect for keeping us warm as the temperatures continue to cool this season. It is lap size measuring 53" x 46".


Linking up with Finish It Up Friday over at Crazy Mom Quilts.

Wednesday, September 23, 2015

How To Make A Shadow Block Mini Quilt

 
Earlier this week I shared my latest quilt finish, a Shadow Block Mini Quilt. Today, you can make one, too. One very important thing to keep in mind with this project is that the smaller the project, the more important it is to be accurate. Be extra careful with your cutting and check to make sure your seam allowance is an accurate 1/4". If you do those two things, your project will come together perfectly.

Fabric requirements:

  • Focus fabric - Twenty 3" squares
    A charm pack (an assortment of 5" squares from a single fabric collection) is a good way to bring variety to the squares, or, if you have been quilting for a while, you can probably find a nice assortment in your fabric stash. If you wanted to cut the focus squares out of the same fabric, you need a quarter yard or fat quarter.
  • Shadow fabric - 1/4 yard or fat quarter
    This fabric should be a solid, medium value neutral. The finished quilt shown uses a tan, but a gray, or even khaki green would work for this. As long as there is contrast with the background, it should provide the right effect.
  • Background fabric - 3/8 yard light solid fabric
  • Backing fabric - 5/8 yard
  • Binding fabric - 1/4 yard

Cutting for the quilt top:

  • Focus squares
    • Cut twenty 3" squares
  • Shadow
    • Cut twenty 1" x 2 1/2" rectangles. 
    • Cut twenty 1" x 3" rectangles.
  • Background
    • Cut forty 1" squares. 
    • Cut twenty 1 1/2" x 3 1/2" rectangles. 
    • Cut five 19 1/2" x 1 1/2" strips.
      These strips form the sashing between each row of blocks. You may want to wait until your rows are sewn together before cutting these strips. That way if your seam allowance is off a little, you can cut these strips to the length of your rows.
    • Cut two 17 1/2" x 1 1/2" strips.
      These two strips will go on either side of the quilt top once everything is sewn together. Again, it might be a good idea to wait and check the width of your quilt for greater cutting accuracy.


 Make the blocks:


Each block needs one 3" square of focus fabric, two 1" squares of background fabric, one 1" x 2 1/2" rectangle of shadow fabric, and one 1" x 3" rectangle of shadow fabric.


First, stitch the background squares to the shadow fabric. Press the seam toward the shadow fabric.


Next, stitch the shorter shadow fabric and background strip to the side of the focus block. Press toward the focus block.


Then stitch the remaining shadow and background strip to the top of the block. Press toward the focus block. Your finished block should measure 3 1/2" square. Check each block and trim it to size if needed. Or, adjust your seam allowance if the resulting block is too small.

Once you have made a couple of test blocks and are pleased with the result, you might want to try chain piecing some of the parts to make it go together faster. Chain piecing is when you have lots of similar piecing to do so rather than starting and stopping for each one, you stitch one right after another without cutting threads.


It can also help with pressing. I chain pieced all the squares to the shadow rectangles. The connecting parts helped my pieces stay flat and secure on the pressing surface. It's hard to wrangle a tiny one-inch square for pressing. Once I had them all pressed, I cut the units apart and continued to the next step.


Arrange Blocks and Add Sashing:


Once you have twenty blocks made, lay them out in four rows of five blocks, switching them around until you are happy with the arrangement.


I tried to do the arranging at the beginning but discovered it was too hard to keep them in order while the blocks were being assembled. You can see where I had already made two blocks to check my accuracy before playing around with the layout. I ended up arranging them again after all the blocks were made.


When you arrange your blocks, make sure the shadows are all facing the same direction. The next step is to add sashing between the blocks. Each row of five blocks will need four 1 1/2" x 3 1/2" background rectangles sewn between. Press the seams toward the sashing strip. If your seam allowance has been accurate throughout the project, each row will measure 19 1/2" long. It is okay if it doesn't. Just make sure to adjust the length of the long sashing strips as needed.

Now stitch long sashing strips (the 1 1/2" x 19 1/2" background strips) between each row, then to the top and bottom of the quilt top.

The last step is to add the remaining two background strips (1 1/2" x 17 1/2") to each side of the quilt top. Your top is finished!

Cut your backing fabric a few inches bigger than the quilt top. Layer the top, some batting, and the backing fabric and get ready to quilt. There are a million ways this top could be quilted, but I really wanted to emphasize the shadow on mine. It is heavily quilted with free motion straight(ish) lines sewn on each one. The only other quilting is straight lines along the edges of each block, both horizontally and vertically.


There is no quilting on the focus blocks so they will stand up just a little more than the rest of the quilt top. Once the quilting is completed, trim and square up the edges and add some binding. I am finally getting the hang of machine binding so that is how the sample quilt is finished.


This quilt is fast and fun to make.


If you make this quilt, I would love to see how yours turns out.

Please leave a comment or drop me an email if you have any questions.


Monday, September 21, 2015

Shadow Blocks Mini - A Finished Quilt


This weekend's project was a fun mini quilt featuring Kaffe Fassett prints.


The idea was to make each print appear to have a shadow or to be floating on the background.


Here is the top before quilting. To help the shadow recede more, the darker fabric around each block is heavily quilted while the rest of the quilt is more lightly quilted.


The quilting gives the back a lot of texture.


Each block finishes at 3" square. The focus prints finish at 2 1/2" square. Overall, this mini quilt finishes at 17 1/2" x 21 1/2".


The binding is a neutral print and includes both the background and shadow color.

The binding is machine stitched.


I love how it looks hanging on the wall. It would also make a great table topper.


This was a fun project to make. I will be posting a tutorial for how to make this quilt later this week.

This quilt is available for purchase.

Friday, September 18, 2015

A Fall Skirt


This past weekend, I made a quick stop by my local quilt shop. In addition to a few quilty purchases, I also picked up this pretty batik from the sale shelves. My wardrobe needs a few additions for fall, and at $7 a yard, it was also a great bargain.


Sassy Skirts by Cindy Taylor Oates is my go to book for skirt making. There are lots of variations in the book but I confess that I have only made the simple A-line, elastic waist version. That is mostly because I tend to wear busy print skirts with solid tops so most extras in the sewing pattern end up getting lost in the busy print of the fabric.

There is only one pattern piece which is used to cut the front and the back of the skirt. I always make french seams on the sides to prevent ugly fraying over time as the skirt is washed and worn. To make a french seam, sew the wrong sides together first using a 1/4" seam. Press the seam allowance to one side. Then turn the skirt so that right sides are together and stitch a 3/8" seam. The 1/4" seam is caught inside the 3/8" seam so no raw edges are visible.


Then press under a 1/4" on the top of the skirt, and press again 1/8" wider than the elastic you will use in the waist band. The pattern calls for 1/2" elastic but I like mine wider so I used 1 1/4" wide elastic and pressed under 1 3/8" to form the waist band. Stitch it down near the edge leaving an opening to insert the elastic. Once the elastic is in, finish stitching down the waist band. I love how fast this goes together and how neat and finished it looks.


In the same way the waist band was pressed under, turn under and press for the hem. 1/4" first, then whatever width you need to make the skirt the right length for you. If this is more than a couple of inches, it would be better to cut off some of the length and then turn under the hem. I like to top stitch the hem and added three rows for this skirt.


This skirt is a little longer than what I usually make but is a good length for fall and also looks pretty snazzy with my boots. It's almost boot season! From start to finish, this skirt took a little more than an hour to make. What a fun way to spend a sewing evening.

Wednesday, September 16, 2015

Simmer - A Finished Quilt


The first hint of cooler temperatures was in the air this past weekend so it was the perfect time to finish this quilt full of yummy fall colors. A few weeks ago, I posted about these blocks. This quilt stalled after the blocks were made. I had to set them aside to think about a layout and even if I liked them enough to keep going. Individually, most of the blocks were great, but all together, they became a jumbled mess.


Hello sashing. They just needed a little something to separate them from each other. There is a funny story about the sashing fabric. A fellow quilter was cleaning out and invited me over to assist in reducing her stash. There was a box in the corner with the label "ugly fabric". My reaction surprised me. I was almost offended that any fabric would be relegated to a box with such a label. This stack of neutral solids is part of what was in that box, which I of course had to rescue. They aren't glamorous but they certainly are not ugly and served to be quite useful in this project.


The majority of the fabric in this quilt is by Kaffe Fassett.


There wasn't enough of any single color for the back so these four one yard cuts worked nicely with their similar colors. This fabric was also pulled from the "ugly fabric" box.


Wavy quilting lines cover the blocks both horizontally and vertically. I love the grid that is formed.


A spiral was quilted on each cornerstone. The spirals on the edges and corners spill off the sides of the quilt. This is one corner before binding.


Here's a better look at the quilting from the front.


Each block is just a little over 14". The quilt finishes at 67" square.


The binding is a solid rusty color that is the same as one of the backing fabrics.


This project was the perfect start to this fall quilting season.

This quilt is available for purchase in my Etsy store.

Linking up to finish it up Friday over at crazy mom quilts and My Journey Back's Fabulous Fall Party.


Monday, September 14, 2015

September Bee Blocks Finished


Today's accomplishment...completed blocks for the Believe Circle of do.Good Stitches. Robin is our quilter for this month. She blogs over at Ormond Beach Quilts. We're making blocks from the Salt Air Crossings Quilt pattern posted at the Moda Bake Shop. Robin asked for orange and white. 

All of the quilts our circle makes have this cute label sewn on the back. 

I love the anticipation of waiting to see the finished quilts after we send in our blocks. These blocks are based on 2 1/2" strips and were easy and fun to make. I'm adding this quilt pattern to my favorite quilts that I might possibly make someday way in the future list. Do you have one of those lists?
Related Posts Plugin for WordPress, Blogger...