I wasn't quite sure if this quilt was "funky" enough to earn such a title, but that bold circle print pushed it over the funky edge for me. This was a fun quilt to make and would be so perfect for a baby or young child.
The three bold prints in this quilt top were the starting point and the rest grew from there.
Because the quilt top is so busy, the quilting itself is a simple straight line grid, with stitches a half inch away from each seam going vertically and horizontally. The thread on top is a green King Tut 40 weight Betty Cotton (color #987). The bobbin thread is a 30 weight Sulky Blendable (color 4008).
Sometimes using different weight threads on top and bottom can cause tension issues with your machine, but this time everything worked out just fine. The backing fabric is a salmon Kona solid.
The choice of binding fabric was supposed to be a no brainer until I auditioned it. I was certain the dark blue was perfect but it looked sort of boring to me. Instead, the funky level is jacked up a bit by the bold striped binding. I am very glad I took a closer look at my choice before cutting and sewing.
The blue option shows up a little better in this picture.
I knew going in that there was not enough of the stripe to make it all the way around the quilt but it's okay. This quilt is supposed to be funky, right? I finished it off with a little strip of blue that is the same fabric as in the quilt top.
Once the quilt was completely finished, I noticed a discolored section on the back. Wow, I was mad. Mad that it was there. Mad that I did not see it before using it, and extra mad because I had already discarded a scrappy backing I made because there was a stain on one of the pieces. The plan was to put this quilt up for sale but there was no way I could do it as it was.
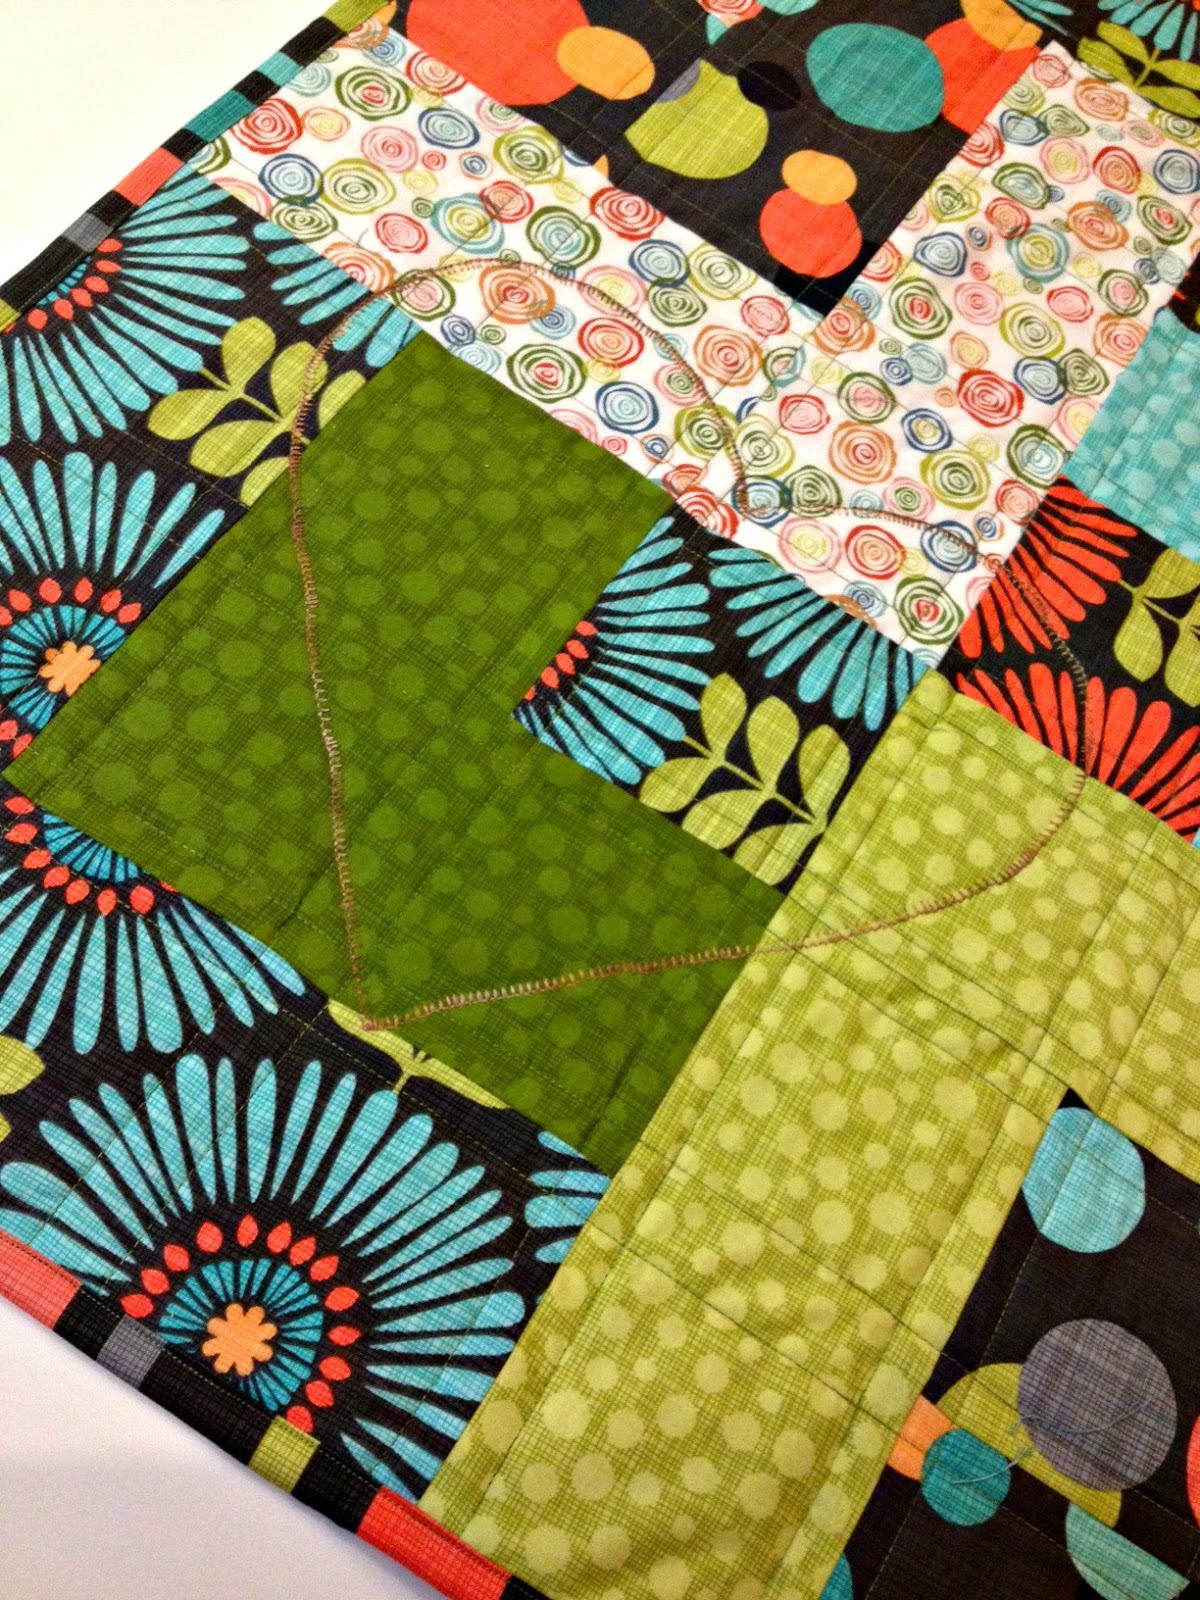
It's all okay now. I fixed it. I appliqued a heart from a cute little owl print right over the top of the problem area. It was just meant to be, that sweet little heart. It adds just the right amount of love to the quilt.
I love those owls.
I also love how the blanket stitching around the heart is echoed on the quilt front.
The finished quilt measures 36" x 48".
Would you like to make your own funky quarter cabins quilt? You have to find your own funky fabric but I can certainly share with you how to make the blocks and assemble the quilt top. If you aren't going for a scrappy version, you will need six fat quarters. The cutting for each fat quarter is very tight, meaning there is very little room for error and if you happen to get shorted even a tiny bit on the fat quarter (it should measure 18" x 21" or more), there will not be enough fabric to cut all the pieces. If you want to be safe, it would be a good idea to purchase a half yard of six fabrics and plan to incorporate the leftovers on the quilt back just to be safe. Each fat quarter should be cut as follows:

First, cut four strips that are 4 1/2" wide each. For two of the strips, cut one 4 1/2" x 8 1/2" rectangle and one 4 1/2" x 12 1/2" rectangle from each. For the other two strips, cut one 4 1/2" x 8 1/2" rectangle and two 4 1/2" squares from each strip. With each fat quarter, there are enough pieces for two blocks with corner and outside and two blocks with middles. So each fabric will appear in four different blocks.
For those of you going for a more scrappy look, each block needs two fabrics. From the first fabric, cut a 4 1/2" square, a 4 1/2" x 8 1/2" rectangle, and a 4 1/2" x 12 1/2" rectangle. These will form the corner square and the outer round of fabric for your block. From the second fabric, cut a 4 1/2" square and a 4 1/2" x 8 1/2" rectangle. These pieces will become the middle round of fabric for the block.
The blocks are very simple with only five pieces in each one.
Before you start sewing, you might want to
check out the process I used to figure out the fabric placement for the blocks. Once you are satisfied with your design, the sewing can begin.
The first step is to lay out the pieces for your block.
Stitch the corner square to the square that begins the second round of fabric. Press the seam to the darker fabric.
Stitch the remaining rectangle of the second color to the long side of your stitched squares. From this point, you will always press your seam toward the piece that was just attached.
Stitch the smaller piece of the outside round of fabric next.
Stitch the last piece to your block as pictured, and your block is complete. Repeat this 11 more times to finish all of the blocks.
As I was working on the layout for this quilt, I would get confused about which way the block should be turned. Finally, I made myself a diagram to make it easier as I moved blocks around on my design wall. Each "X" shows where the corner square for the block belongs.
Stitch the blocks together for each row, alternating the pressing direction of the seams. Rows one and three, press to the right. Rows two and four, press to the left. This will help the rows go together easier.
Once all the rows are made, stitch them together for your own funky quarter cabins quilt top.
This quilt (cute heart on the back and all) is
available for purchase.
There are lots of scraps on my cutting table from this project. A smaller, scrappy project might be underway next week.
Linking up with
Finish It Up Friday over at Crazy Mom Quilts.
Other posts that might be of interest:
Quarter Log Cabin Quilt Finish
Giraffe Baby Quilt and Tutorial