Showing posts with label gift. Show all posts

Monday, December 21, 2015

Star Wars Scarves: A Quick Gift Project


After making some Star Wars pillowcases, there was leftover Star Wars fabric. It took a while to figure out something fast to make, but then I remembered seeing several good scarf tutorials. There wasn't enough fabric to use for the full side of a scarf but there was enough for accents. I also wanted something really soft, so black minkee was the perfect choice for the body of the scarf.
Minkee is a wide fabric at 60 inches, so I cut a 13 inch panel across the width of the fabric. Then I cut two pieces from the Star Wars fabric 4 inches x 13 inches and turned under a quarter inch on the top long side and pressed it.
The Star Wars fabric was laid on the top of each end of the minkee and then the turned under edge was top stitched to the minkee. I wanted the whole scarf to have the weight and feel of the minkee so that is why I stitched it on top of the minkee rather than adding it to the end.
After that, the scarf was folded in half across the long edge with right sides together. The edges were stitched closed except for an opening near the center so that the scarf could be turned right side out. Once it was turned, the opening was top stitched closed.
It is just the right length and says Star Wars without being too obnoxious about it.
The first scarf I made used fabric with yellow letters. It was a little too loud and too wide for what I wanted. I like the subtle look much better.
Four more gifts ready to wrap and put under our tree. While the first scarf took a little longer to make as I was figuring out the measurements I wanted to use, the last two scarves went together in about fifteen minutes each. I will definitely keep this project in mind for future years. This wraps up my gift sewing for this year. Hope you are nearing the end of yours, too.

Linking up to Design Wall Monday at Patchwork Times. Linking up to Let's Bee Social at Sew Fresh Quilts, Fabric Tuesday at Quilt Story, and Finish It Up Friday at Crazy Mom Quilts.

Monday, December 14, 2015

Dresden Candle Mat Mug Rug Gifts

This post contains affiliate links.

There has been a whole lot of Dresden going on this week. I saw a cute stack of Dresden mug rugs on Pinterest and decided that I wanted to make some for gifts.


I had part of a Moda Jelly Roll left from another project. It is the HoHoHo collection by Deb Strain.


EZ International Easy Dresden Tool

The Easy Dresden ruler makes the job of cutting Dresdens super easy. If you are interested in purchasing your own Easy Dresden Ruler, clicking the picture and link above will take you directly to the Craftsy site. I highly recommend this tool.


As I was making them, I thought of more and more people that I wanted to give something to. I decided that I would make as many dresdens as I had fabric. When sewing them to form the points, I chain pieced them. I was a bit overwhelmed by the size of the pile when I was finished. Cutting them apart was a bit awkward until I figured out that I could lay them in rows on my ironing board and go down the line with my scissors, snipping them apart.


At first, I organized them four at a time. It takes twenty wedges to make one Dresden block. They look pretty all lined up in a row.


Here are the first four. Once I got this far, I knew I would finish them all.


After the first four, I sorted all the wedges by color and made them one at a time.


It is amazing how different each one looks. Once all the wedges were sewn, there were 25 Dresdens.


To finish them, there is a felt circle covering the open hole and another piece of felt behind the Dresden as background. The circle is stitched down as well as the points around the Dresden.


I was hoping to show you a finished stack of 25 Dresden mug rugs, but I didn't quite get finished. The ones on the front right just need to be trimmed and I will get to that today. While most of them have a red center and background, there are a few greens, and even one black in there. It was all about the supplies I had on hand.


Looking forward to finishing these in the next couple of days and gifting them next week to some very deserving people. I wish I could have made a hundred. Hope your holiday sewing is just as much fun as mine is.

Purchase your own EZ Dresden Tool here:


EZ International Easy Dresden Tool
Linking up with Design Wall Monday at Patchwork Times and Monday Making at Love Life Quilt. Also linking up with Fabric Tuesday at Quilt Story.

Wednesday, December 2, 2015

Nerdy Star Wars Pillowcases

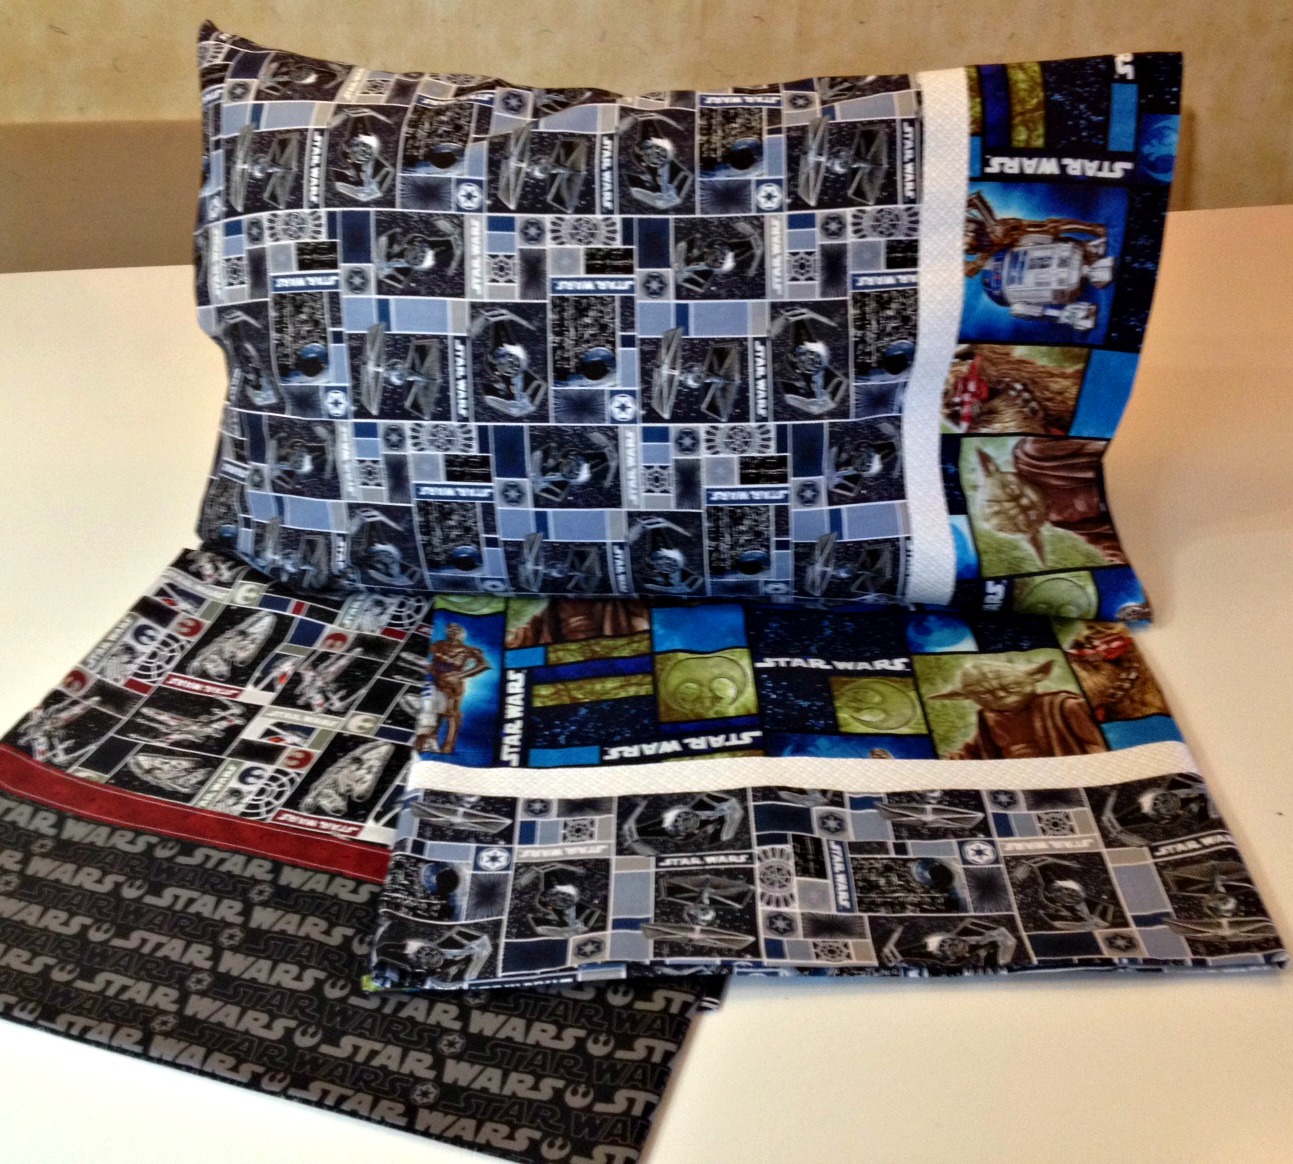
Let's pause for a moment and reflect on the nerdy awesomeness of these pillowcases. My boys are all crazy Star Wars fans and with the new movie coming out this month, I had to join in with these pillowcases that they will just LOVE!
This one will go to one of the teens. I matchstick quilted on the light colored trim with glow in the dark thread. There are seven rows of stitching. I've had the thread a while. It is a 30 weight polyester thread by Superior Threads. I have not tested its glowing qualities yet.
This one will go to the other teen. It is an inverse of the first one.
This one will go to my Navy son. For the moment, he is living on the ship and is limited in what he can do to personalize his space. I think he'll like this special touch.
There are some really great pillowcase making tutorials out there. This time, I used this burrito pilllowcase tutorial over at Made by ChrissieD. Her instructions are clear and easy to follow. It has been a while since I made a pillowcase and needed a review. The timing of her tutorial was just perfect.
It was really hard not to post this on Instagram. My kids never read my blog but they do follow my Instagram feed. It's also hard not to go ahead and give these to them, but they are Christmas gifts so I will hide them away and hope to goodness that I remember where they are when the time comes!

Happy gift sewing!

Linking up with Work in Progress Wednesday over at Freshly Pieced and Let's Bee Social at Sew Fresh Quilts.

Monday, November 30, 2015

Pot Holders - The Perfect Project for Orphan Blocks

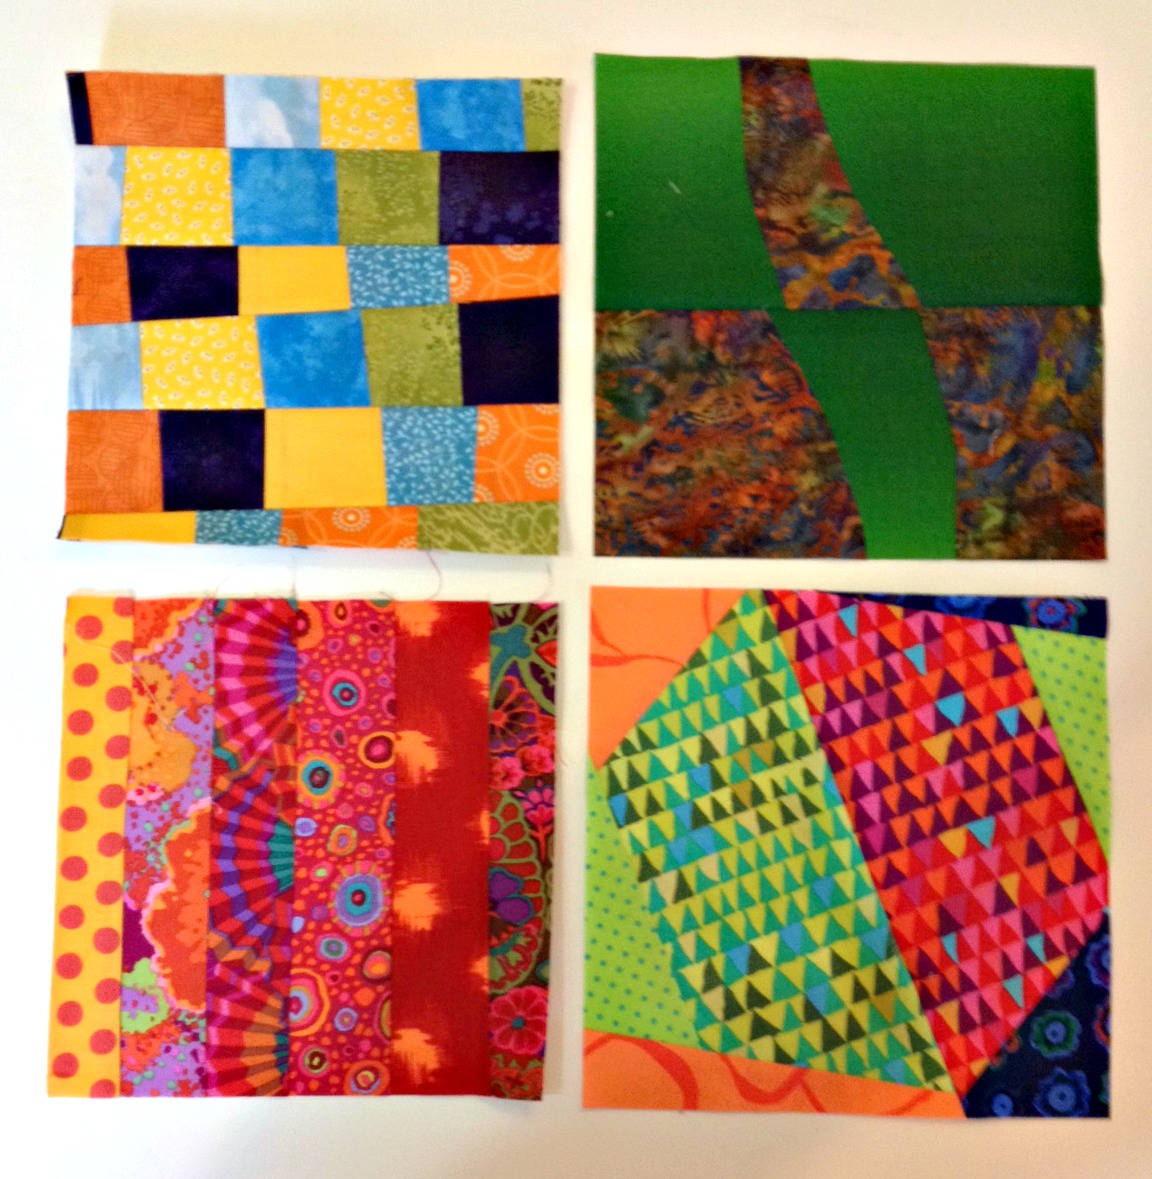
Our pot holders were starting to look a bit worn and dirty. It was time for some new ones. Normally, I break out my scrap bin to whip up a few improv pot holders but this time I decided to dig into my bin of orphan blocks. That bin is getting a bit full and I thought it would be faster to start with something that was already pieced.


I'm not sure it was any faster because I was having a good time going through all the pieces and parts from other projects.


I eventually culled it down to some reasonable possibilities. A couple of things I have learned is that light fabrics are not the best for pot holders. Maybe that is obvious to most of you but I had to learn that the hard way.  I tried to stick with medium to dark colors for these.


Sometimes it was just a matter of cutting a larger block into a square.


Eventually, these four tops were ready to go.


Then I had to choose backs for each one. While I was looking for backs, I ran across the Amy Butler print in the upper right. I love that print so a fussy cut square became the fifth pot holder in the set.

Here they are all layered up and ready to quilt. I just finished the last lesson of my Craftsy Creative Quilting With Your Walking Foot class so  I decided these would be a great way to practice those skills.

When I make a pot holder, there are either five or six layers. From left to right: the backing fabric is face down, then a layer of Therma-Flec shiny side down, then a layer of batting, then another layer of Therma-Flec shiny side up, then the top fabric face up. If there is a sixth layer, that means I have used two layers of batting in the middle. I decided to just go with one this time.

Before I share the finished pot holders with you, I just want to say it was not a great binding day. So please don't judge me for my bad binding. Even with that, I think these are super cute and I'm looking forward to using them.
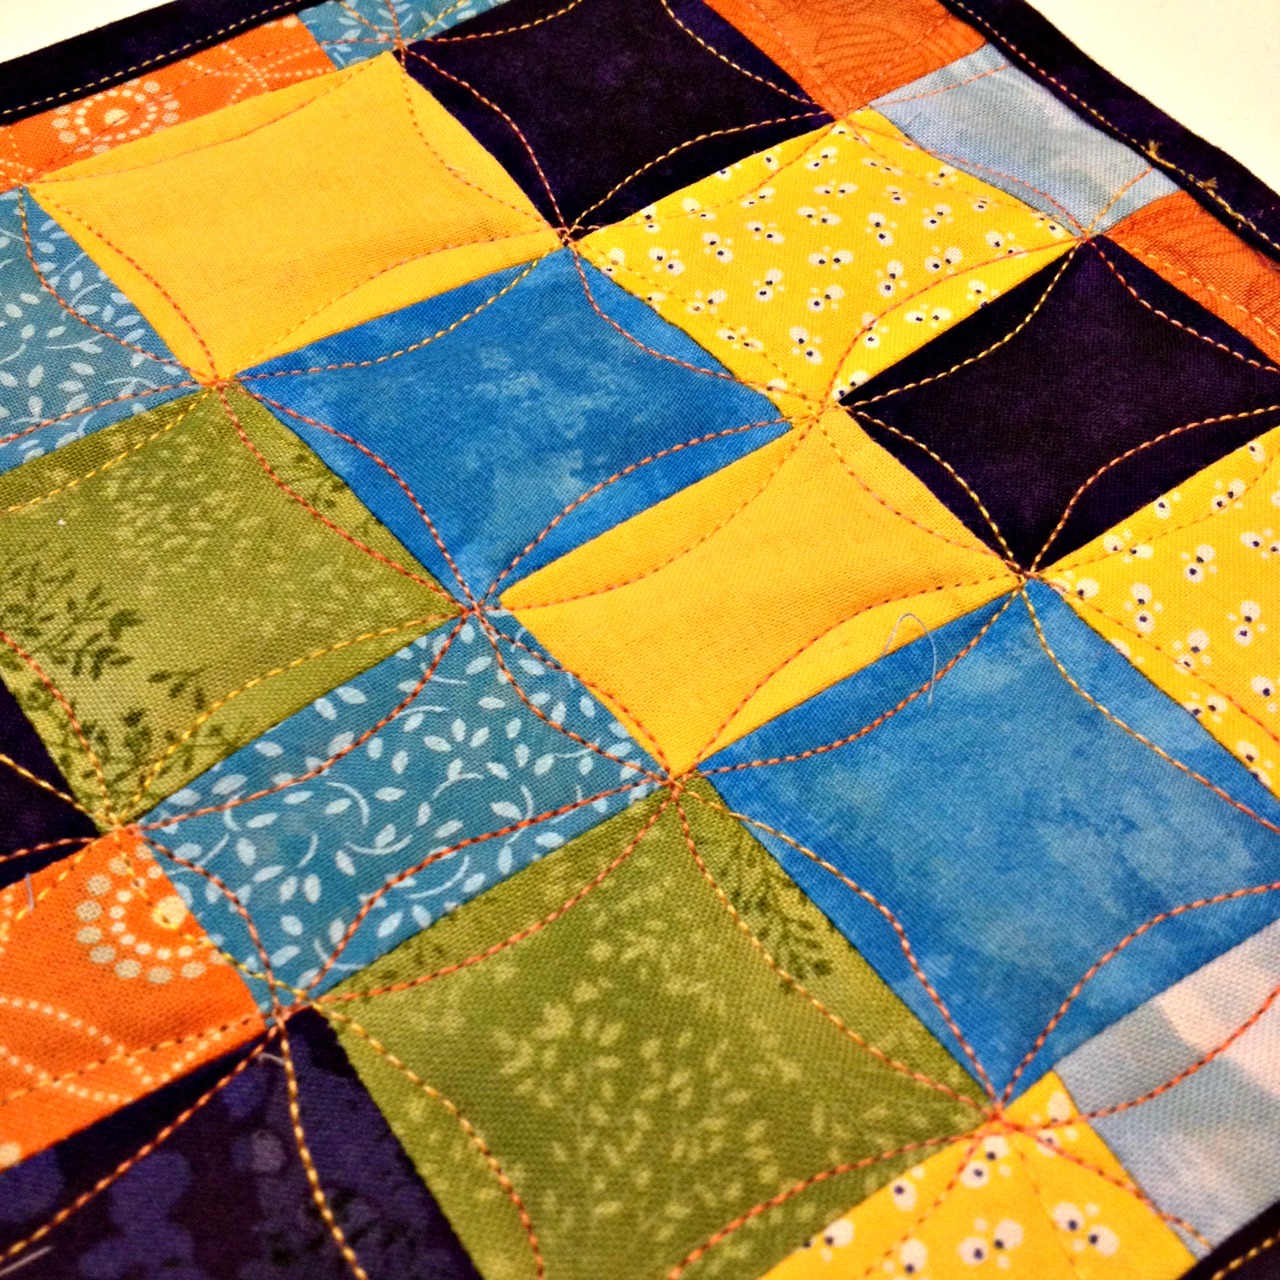
One of the suggestions for quilting from the class is to echo quilt in each shape of the quilt. That is what I did with this one, and it was fun. I can't imagine doing that much rotating with a large quilt, but it is perfect for something small.
The quilting just blends into the back of this one, although I love this fabric.
Here's a better look at the quilting. Note that this pot holder is the only one with a hanging loop. I've done loops before, but this one gave me a really hard time. You might notice a bit of angry quilting making sure it was well secured. I have never hung my pot holders anyway so I skipped the loop for all the rest.
This one demonstrates radiating lines from a single focal point. I used painters tape to mark each line one at at time so they were evenly spaced and stayed nice and straight.


Some of these look better from the back than the front. This is one of them.
Here's a closer look at the quilting.
This one is quilted with wavy lines. They are hard to see on the front.
It was easy to be inspired by this backing fabric. At first, I thought I would try to follow the lines in the fabric but decided it would be easier to quilt down the middle of some of the stripes.
Here is a closer look at the quilting.
These were some orphan strips that I stitched together to make a square. They were never intended to be perfect rows with matching points. I wasn't sure this orange peel style of quilting would work with their wonkiness but I gave it a try anyway. I like the result.
Here is the back. Owls!
Here is a better look at the quilting.
I think this one might be my favorite. It is quilted with a spiral. And I may be just a bit taken with that Amy Butler fabric.

The spiral shows up better on the back.
Here's a closer look at the quilting from the front.
This is all of them from the back.
And one more time from the front. I had the best time making these. I used up some orphan blocks, practiced some quilting skills, and now have a bright, colorful set of pot holders to cheer up my kitchen.

Linking up with Design Wall Monday at Patchwork Times and Monday Making at Love Laugh Quilt. Also linking up with Sew Darn Crafty at Sew Many Ways and Fabric Tuesday at Quilt Story.

Related Posts Plugin for WordPress, Blogger...