Sunday, January 30, 2011

Thread Sketching for the First Time

I have been exposed to lots of thread sketching over the past couple of weeks. Susan Brubaker Knapp was at the shop a week ago and then Sarah Hubbard was showing some of her work on her blog. I just couldn't wait any longer to try it. It didn't matter to me that I didn't have all the best supplies. I had thread and I had fabric and the rest would just work itself out. It is rare for me to sew just for me, so I seized the moment.

I started with some fabric that I had been holding on to for awhile. It is one of those "too pretty to cut" pieces. It was hand dyed by Anita Heady. I laid it out on my table and selected every spool of thread that might work with it.


I was just sure this was going to be some sort of nature scene. The fabric just screams sunshine, sky, and water. So I did a bit of doodling to get some ideas for what I might thread sketch. The photograph isn't very good, but I hope you can see rays of sunshine near the top, some circles in the middle, and icicles near the bottom.


However, every time I looked at the fabric, all I could see were people and faces. I was especially drawn to this part of the fabric which looks like a woman with her arms held out.


So I got my paper back out and sketched some more.


Again, not such a great picture. It's a woman with her arms held out and the word "dream" over her head. There are some arched lines in the background and some zigzag lines around her feet to give some sort of ground around her. Enough drawing...time to sew!
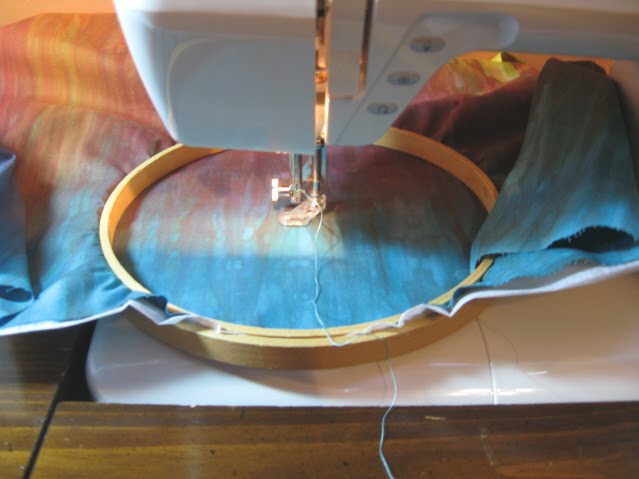

I have never sewn with a hoop so I thought I'd give it a try. I had some Sulky Tear Away stabilizer on hand so I put two layers behind my fabric. I have free motion quilted before and I thought this would be similar. I found it to be easier than quilting since there was less bulk than with the three layers of a quilt. It was also easier because of the small size of my project. I started by sewing the woman and worked my way around her.


This was FUN! I had some tension issues, and some areas with crazy stitching since the project had minimal planning and sometimes I changed my mind in the middle of stitching and used my thread to scribble rather than sketch. I like how the woman turned out. She looks sort of like a ghost or spirit. Here's the finished project:

The finished project is about seven inches by nine inches. That means I still have a lot of hand dyed fabric left to play with. I hope I can fit time in my schedule for more experimentation. This one will be hung on the wall behind my sewing machine to inspire me to try again.

Friday, January 28, 2011

Projects This Week - A Little Bit of Everything

The sewing room is never quiet for long, and I've managed to squeak out a few fun things this week.

Here's a cute banner I made from Nancy Halvorsen's Count On It book. Saturday, January 29 is our annual customer appreciation party to celebrate all of our wonderful customers and to mark our 4th shop anniversary (my how time flies!). I thought this banner would be the perfect welcome as you enter the shop. Everyone who walks through the door on this special day will receive a gift. It might be a fat quarter, a book, a pattern, or a number of other goodies. Stop by if you can.


Our mannequins have been hiding in the back of the shop, patiently waiting for something new to wear. One of them finally came out of hiding this week. This is Kaffe Fassett fabric and Amy Butler's Mini-Dress pattern. I thought this would be a garment suited to the younger set, but once I finished it, I think it's perfect for all ages. The big pleat in the front does a great job of masking the less than perfect figure, and it can be made in several lengths. It can be a shirt, a tunic, or a dress. This one is tunic length.


The last thing I worked on is a pair of pillowcases for my younger boys. This was their payment for helping me at the shop over the winter holidays. They each selected their own fabric and I promised to have them done in January. One thing that has always been a problem for me with these pillowcases is that when they are washed, the trim tends to flip up or wad. This time, I remembered to stitch the trim down so it wouldn't do that. The fun thing is that I remembered that I had some glow in the dark thread from Superior Threads. Yep, I top stitched the trim with it. It is very cool. Each pillowcase has a pin stripe of glow in the dark awesomeness when the boys get tucked in to bed.

The thread is white in the daylight so that sort of limits its applications. If it were clear, I'd be using it all over the place.


Sunday, January 23, 2011

Fun at Work and Play

From the work side of life...

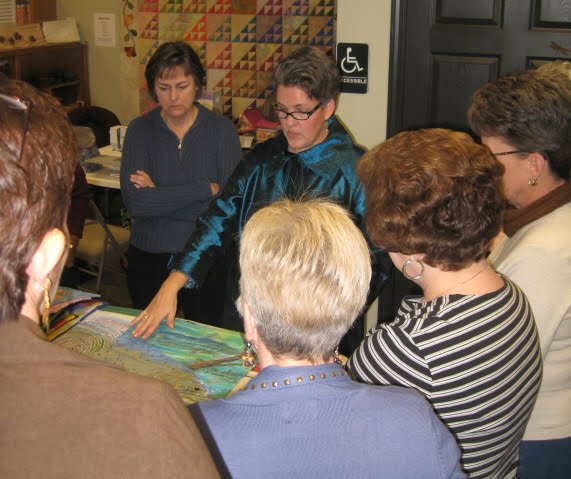
The classroom was busy all day Friday and Saturday while Susan Brubaker Knapp taught two workshops. We were thrilled she made time for us in her busy schedule. On Friday, she taught Start with a Photo and on Saturday she taught Thread Sketching. Though I was not a student in the workshops, I was at the shop working part of each day. Susan brought lots of her quilts with her and it was a great opportunity to see her work up close. Most of the class pictures shown here were taken by Susan (Thanks for sharing!).


From the play side of life...

I spent a good part of my weekend transporting teenagers to events associated with the University of Georgia's Janfest. This is an awesome music festival for high school students in Georgia and surrounding states. It gives young musicians audition experience, clinic instruction, and participation in an honor band or clinic band. Evan, my 17-year-old, and several of his friends participated. Somehow my camera didn't make its way to any of the band events but was with me during some of the waiting. My two younger children decided it would be fun to pose on rocks that were spread around the parking lot while we waited. Those crazy kids.


Monday, January 17, 2011

Give Me a "D"

This project comes straight from Nancy Halvorsen at Art to Heart. It is in her latest book, Count on It. We're sold out of the books at the shop so if you can't wait to get one, try the Art to Heart web site. I'm hoping we'll be restocked by the end of January. The garland in the book says "Happy Birthday" but I wanted something that could be used every day, and she includes the entire alphabet so your garland can say anything.

The steps for this project are standard for any fusible applique project.

1) Trace the appliques onto two-sided fusible webbing.


2) Iron the traced appliques to the wrong side of your fabric and cut them out.


3) Fuse the appliques onto a background.


All I have left to do on this one is to sew the blocks to a ribbon and hang it at the shop. Very cute.

The part of this project where I'd like to offer an alternative is in the construction of the background blocks. If you like to make small projects, they often do not require binding in the way a traditional quilt does. My least favorite part of these projects is when it says, "Sew right sides together leaving a small opening to turn." Those small openings can be a pain for getting a project turned, making neat corners, and getting the opening closed so that you can't tell where it was turned. I prefer to construct them in a way that is often called an "envelope" or "pillow cover" method. Since this specific project needed 18 background blocks, I was interested in making it as easy as possible.

First, determine the cut size of the background block. For the width, add half an inch to the finished width of the block. For the length, multiply the finished block length by 2, then add three inches. My finished width is 4 1/2" so my cut width is 5". My finished length is 6 1/2" so my cut length is 16".

From my background fabric I cut 16" by the width of fabric.

Next, open up the fabric and finish the long edges. Turn under a quarter inch and top stitch 1/8" from the folded edge.


Now, it's time to cut them into five inch pieces for the individual blocks. I was able to get eight background blocks from each 16-inch panel.


At the ironing board, lay one background piece right side up. Fold one of the short ends towards the middle so that there is about four inches folded in. Then fold the other short end toward the middle overlapping the first piece so that the total length of the folded piece is 6 1/2". Press.

Take this piece and lay it directly on top of a piece of batting cut 5" x 6 1/2". Sew a 1/4" seam along both long sides. The result should have fabric on one side and batting on the other.


It's time to turn it right side out. It's so nice to have a full side to turn. The corners turn out clean and crisp since there is stitching only on one side of the corner. Use your favorite turning tool to poke out the corners. My favorite tool is a bamboo skewer.

Here's one finished background block.

Iron on all those appliques for a fun garland ready for any occasion.


Saturday, January 15, 2011

I Heart You UFO

It all started with an unfinished project (known in the quilting world as a UFO). I remembered that I had a Valentine's Day something that I hadn't finished from a year or two ago.


It's somewhere between a too big place mat and a too small wall hanging or table topper. I had no place in mind to put it and not much motivation to finish it, so... I cut it up! It worked perfectly to cut it into six rectangles. I applied double-sided fusible interfacing and fused the fabric to some blank note cards. The result...fabulous.


They're even cute on the back side.


It felt good to finish a project, even if it was in an unexpected way. These cards will be up for sale in the Etsy shop in the next few days.

Friday, January 14, 2011

My Sewing Space


Here's a quick look at my sewing space from afar. It usually isn't this messy. Really, it isn't. I'll get in there and share more details when it's cleaner. I tend to let it get a little messier than this, then the world has to stop spinning until I clean it up. It's the bonus room over the garage; we fondly refer to it as "the orange room". It serves many purposes. In the back right is where Duane services sewing machines. My work table, sewing machine, and ironing space are just in front of that. The sewing machine is right under the sky light and it's perfect for daytime sewing. The back left houses my stash. In front of my stash is a computer area where you can generally find one of my kids playing computer games. In front of that is the dog sofa. It's the only piece of furniture in the house he's allowed on and it's his favorite spot. In front of my sewing area is a small television. It is not unusual for the entire family to be in this room for one form of entertainment or another.

Thursday, January 13, 2011

The rest of the shop samples...for now

Here are the last of the new shop samples. Don't fret, we're already conjuring up a few more.

This sample says it all about our part of the world over the past few days. Suzanne Butt made this cute Snow Day wall hanging from Patrick Lose's book Poster Quilts. She used fabrics primarily from Robert Kaufman's Fusions collection.


Jessica Howard made this darling apple quilt. She said the apple blocks were lots of fun to piece. The pattern is Eleanor Burns Apple Cake and was made using a mix of fabrics from our 1930s area.


I wish I had a full picture of this quilt. It is fabulous. Suzanne Butt brought this work in progress to the shop last fall and my first question was, "Can I hang it in the shop?" Our black and white area needed some freshening up and this was just the piece to do it. It is from the pattern Lady Madonna by Abbey Lane Quilts.


Suzanne Butt also made this wall hanging from the pattern Freedom by Cottage Creek Quilts. We have samples from several of the patterns in this series, but this one might be my favorite. It's a simple reminder of something that I so often take for granted.


Last, but not least, is this little cutie that is perfect for Valentine's Day. I whipped this one up and learned that I need some practice making tiny pinwheel blocks. Wouldn't this make a great baby quilt? For those of you with embroidery machines I can picture a name and birthdate in the center hearts. It finishes up at under 30" square.


More soon!
Related Posts Plugin for WordPress, Blogger...