Friday, January 7, 2011

Haberdashery

Even with all the new samples that were revealed at the shop this week, there are still a few projects hovering around my sewing machine that did not get finished. One of them is this cute hat pattern by Sew Baby.


As you can see by the pattern cover, there are lots of options in this pattern. There are also lots of sizes for each one. I thought it would be "kids hat - ones size fits most", but instead, there are five different sizes for each hat style to fit a newborn up to a size 10. So think about it...that many hats times that many sizes...makes for about a million pattern pieces. It was sort of like playing a Where's Waldo game to find the right ones, but I conquered the pattern tissue and found what I needed. It really is pretty awesome to include so much in one little pattern, so I didn't mind sorting through the options. My goal for the afternoon was to make the girl's tulip hat and the boy's engineer hat. I decided to go for a smaller size and make both of them in size 2T.


The girl's hat has six petals and it was oh so tempting to do every other one in a different fabric (it would also be great to do in scraps). I resisted because, even though I didn't see that it said this hat is reversible, I think it will be (and it was!).
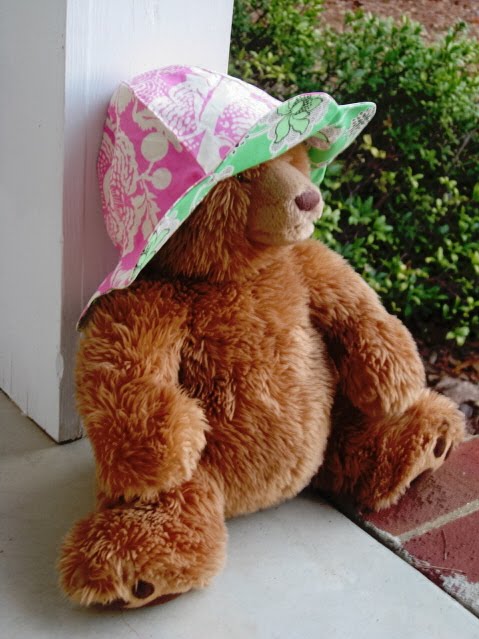

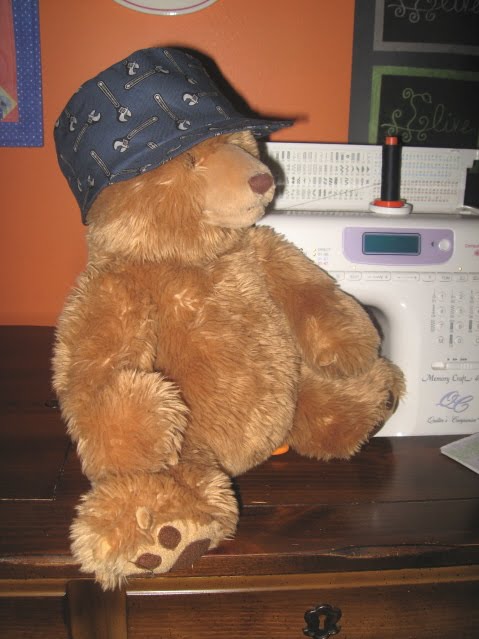
Here's the closest model to a size 2T that we have living at home. Both of the hats were very easy to make. The instructions were clear and I love the results. The only tricky part was pressing them because of all the curves and dimension. The easiest way to do the pressing is with a ham or a rolled up towel. The other thing to keep in mind if you want a reversible hat is to be sure to sew neatly and carefully when you close the hole used for turning the hat right side out.

If you make children's clothes, just get an extra 1/3 yard and you'll have enough to make a matching hat!

Thursday, January 6, 2011

Fabric Fortune Cookies Finale

I'm pleased with the final results from the fabric fortune cookie experiment. Once they all dried, it was easy to fold up the fortunes and tuck them in one side of the cookie. The take out boxes I found are smaller than I thought they would be, but work perfect for four cookies. We'll see what the etsy world thinks of them. If you'd like to make your own fabric fortune cookies, check out my how to blog entry from a few days ago.

Wednesday, January 5, 2011

Highlighting Kaffe Fassett

One of our favorite fabric designers is Kaffe Fassett. We try to keep a good selection of his new prints along with many of his classic fabrics. These new shop samples all highlight his fabric.

Deb Henderson made the first three of these. This one is from the Eleanor Burns pattern Pinwheels & Rectangles. It uses Kaffe's Plink and Roman Glass.

This sample is the cover quilt from Alex Anderson's Super Simple Quilts #2. It uses Kaffe Fassett's Persimmon and Paperweight along with two of Robert Kaufman's Fusion prints. It was quilted by Sherry Paul.


This hot sample is from the book Four Patch Frolic. The small squares are a variety of Kaffe Fassett and Brandon Mabley prints all framed out by one of Kaffe's Spot prints.
I pieced this last one, but Jessica Howard is responsible for the pattern (from Sweet and Simple Baby Quilts by Mary Hickey) and fabric selection. Holley Downs did all the machine applique. I love the way it turned out. It's perfect for a baby quilt. With the exception of the block background fabric (which is by Annette Tatum for Free Spirit), all of the fabric is by Kaffe Fassett.
Tomorrow, I'll highlight all the new samples for which there is a class or club to go with them.

Tuesday, January 4, 2011

Shop Samples for the New Year

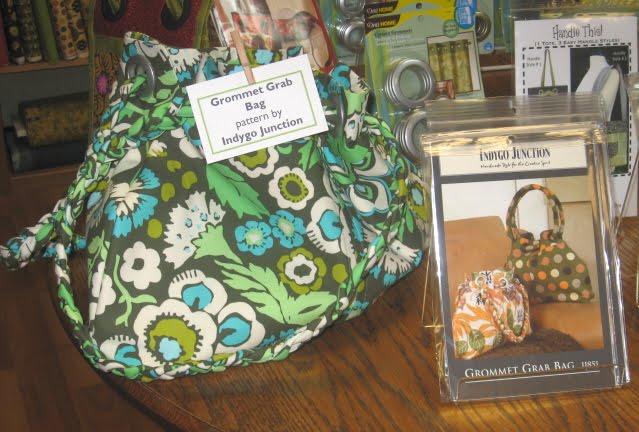
Today is our first day open for the new year at the quilt shop and I'm ready. I came in early and decided to take pictures of all the new shop samples. I knew we had all worked hard, but I had no idea there are more than twenty new samples in the shop. Rather than overwhelm you with them all, I'll post a few each day. Today, enjoy a new area we set up to feature grommets. Grommets add a great touch to any bag, and the newest ones don't require any special tools. They simply snap together. If you use these, make sure you have enough interfacing or stabilizer between your fabric layers to give them something to grab on to. My favorite is the Grommet Grab Bag. The braided handles were fun to make and should be very durable.


This next one is called the Wallet & Grommet by Maple Island Quilts. I just love the name since I'm a big Wallace and Grommet fan. Fay Rawls made this sample for us.


And finally, two more by Indygo Junction: The Grommet Hipster and the Grommet Wallet.


I'll get these patterns posted in the Dragonfly Quilt Shop web store this week. Look for more fun samples tomorrow!

Monday, January 3, 2011

Fabric Fortune Cookies

I've been working on some new ideas for the Etsy store...something special for Valentine's Day. At the quilt shop, we used these last year for door prizes at our customer appreciation party. The fortunes hidden inside revealed a special gift for each recipient. I wanted to try for a more romantic version this year. These are really easy to make and involve no sewing. Each cookie has an inside and outside so choose two fabrics for each. This is a great way to use some of your fabric stash and is also perfect for those 5" charm squares. My 20-year-old daughter helped me with these so she chose the fabric we would use.
The first step is to fuse the two fabrics together using a two-sided fusible web product. I use Steam-a-Seam 2 light. It comes in lots of sizes. I used about a half yard of the 24" wide and four different pairs of fabric. Follow the product instructions to fuse the fabrics together. Once the fabrics are fused together, trace circles onto one side. I cut a 3 1/4" circle from a piece of heavy template plastic. No special marking tool is needed. A ball point pen works great. Trace as many circles as will fit on your fabric.
Use scissors to cut the circles out. The action of cutting the two fused pieces of fabric helps seal the edges for a better bond.The next step is to fold the circles in half and fuse just the edge together. I used Steam-a-Seam 2 light for this step as well. It only takes a small rectangle to hold the cookie together.

Here is what they will look like once the folded cookie is bonded. There is no need to create a crease or hard fold. The goal is to attach the edges so that the cookie is a semi-circle.The next step is to make the final fold into a fortune cookie. To fold the cookie, insert your index fingers in each end. Put your thumbs in the center and pull the ends together.

Use a paperclip or clothes pin to hold the cookie together. This will also serve as a good handle while you are painting them. In order for the cookies to last, they need to be coated with a fabric stiffener. I use Stiffy, but there are plenty of similar products around. You can also use watered down Elmer's glue.

The cookies need drying time. I inserted straight pins around a styrofoam bowl and hung the paperclip around the pin. They could be hung from a string to dry as well.While they are drying (which takes a couple of hours), it's time to think about what will be written on the fortunes. I stuck with basic Valentine's Day sayings, like "XXOO", "Be Mine", and "All You Need is Love". My daughter suggested that it would be fun to just put one letter on each fortune and have the recipient figure out the message.

I'm off to find some Chinese takeout boxes to hold the cookies. I'll show the final product when we're done.

Sunday, January 2, 2011

The Boys Grow Up

Believe it or not, I'm not always working at the shop or sewing. This week, I helped our youngest two boys clean out their closet and rearrange their room. The holidays brought a few new toys into our lives and it was time to clean out some of the old. They were also ready to outgrow their bunk beds and have a more big kid room. Here's what it was like before the move:

We had to work hard to pare down the collection of toys, but there were many things they had grown out of. We'll be contacting some of our friends with younger kids to see if they want to share the love with us, and what's left will be donated to Good Will. We decided that yard sale weather was just a little too far away. After cleaning out the closet and moving things from the room into the closet, we converted the bunk beds to twin beds. There's still some wall repair and painting to be done, and more art work is needed for the walls. The boys love the result, and so do I.

They each got a new quilt from me for Christmas. The pattern is adapted from one I saw in a recent issue of Quilts and More magazine. I changed the measurements to more efficiently use my stash of Kaffe Fassett fabrics as well as to be a good fit for their twin beds. We sorted the scraps into color families, then each of my guys picked the ones they wanted used in their quilts. One chose reds and yellows and the other chose blues, browns, and golds. I like the same, but different look.

Saturday, January 1, 2011

A Favorite Tool - The Angler

I've been working on lots of shop samples over the past couple of weeks. We like to freshen up with a blast of new samples when the shop opens for the new year. My most recent is an adorable quilt using Amy Butler's Soul Blossom collection. The pattern is from Alex Anderson's Baby Quilt book and is a great pattern for showing off a large scale print. The finished top is 39.5" x 39.5".
I am not a fan of drawing diagonal lines on the back of fabric squares for accurate half square triangles or flying geese. It just takes up too much time for me. Last year, Pam Bono visited and taught at our shop. She is an awesome pattern designer, especially patterns with detailed piecing. Her husband, Robert, developed a tool called the Angler to help make more accurate 45 degree seams without the extra steps of drawing lines on your fabric pieces. I love this tool and use it everytime I make half square triangles or flying geese. Here it is attached to my machine:
It is really easy to set up on your machine, and a little masking tape holds it in place. The angled lines are used to keep your fabric correctly positioned, and once the bottom point of your square approaches the needle, it can be lined up on the center line. Here is one of my flying geese in progress:
I'm not one to grab up every new tool out there, but when I find one that works for me, I'm hooked. We carry the Angler at our shop, and I'm sure you can find it at your local shop, too.
Related Posts Plugin for WordPress, Blogger...